Strip Display
Strip Designer Window Overview
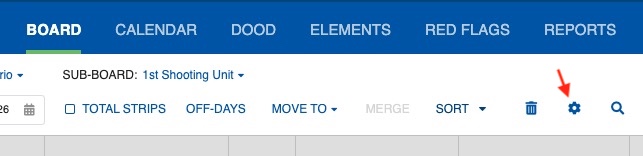
Customize how your Strips display by selecting Strip Designer from the Design menu, or by clicking the Edit icon.
On the Strip Designer window, you can:
- Customize the Strips display
- Customize the Strip Colors
- Customize the Day Break strips display
- Customize the Shoot Day strips display
- Add different Strip Layouts
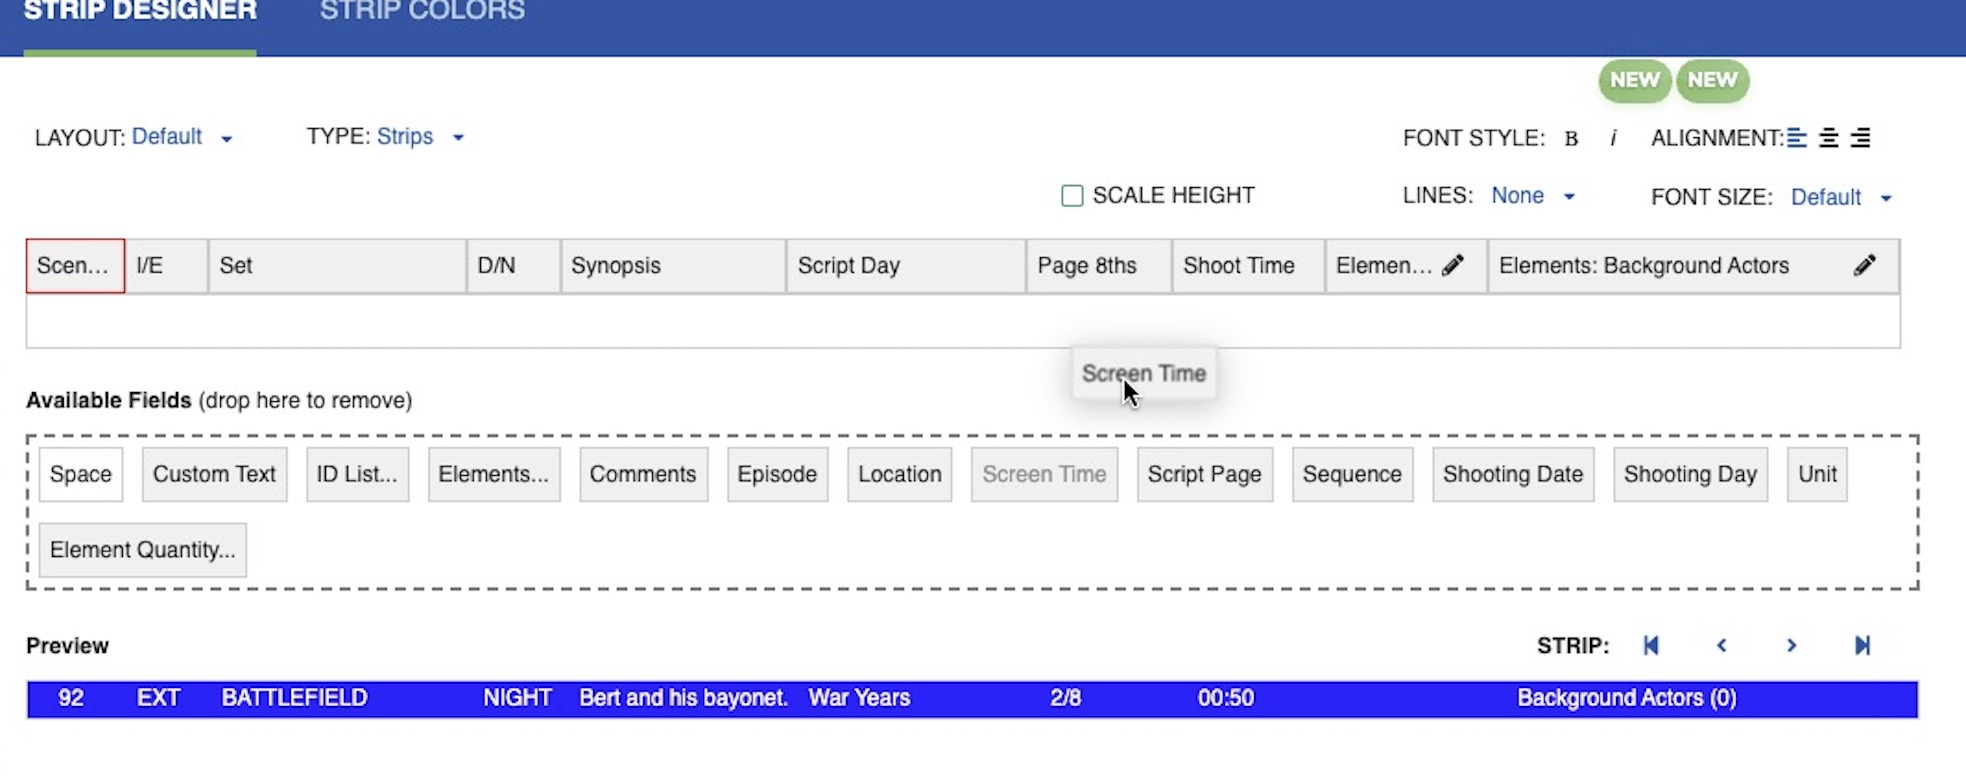
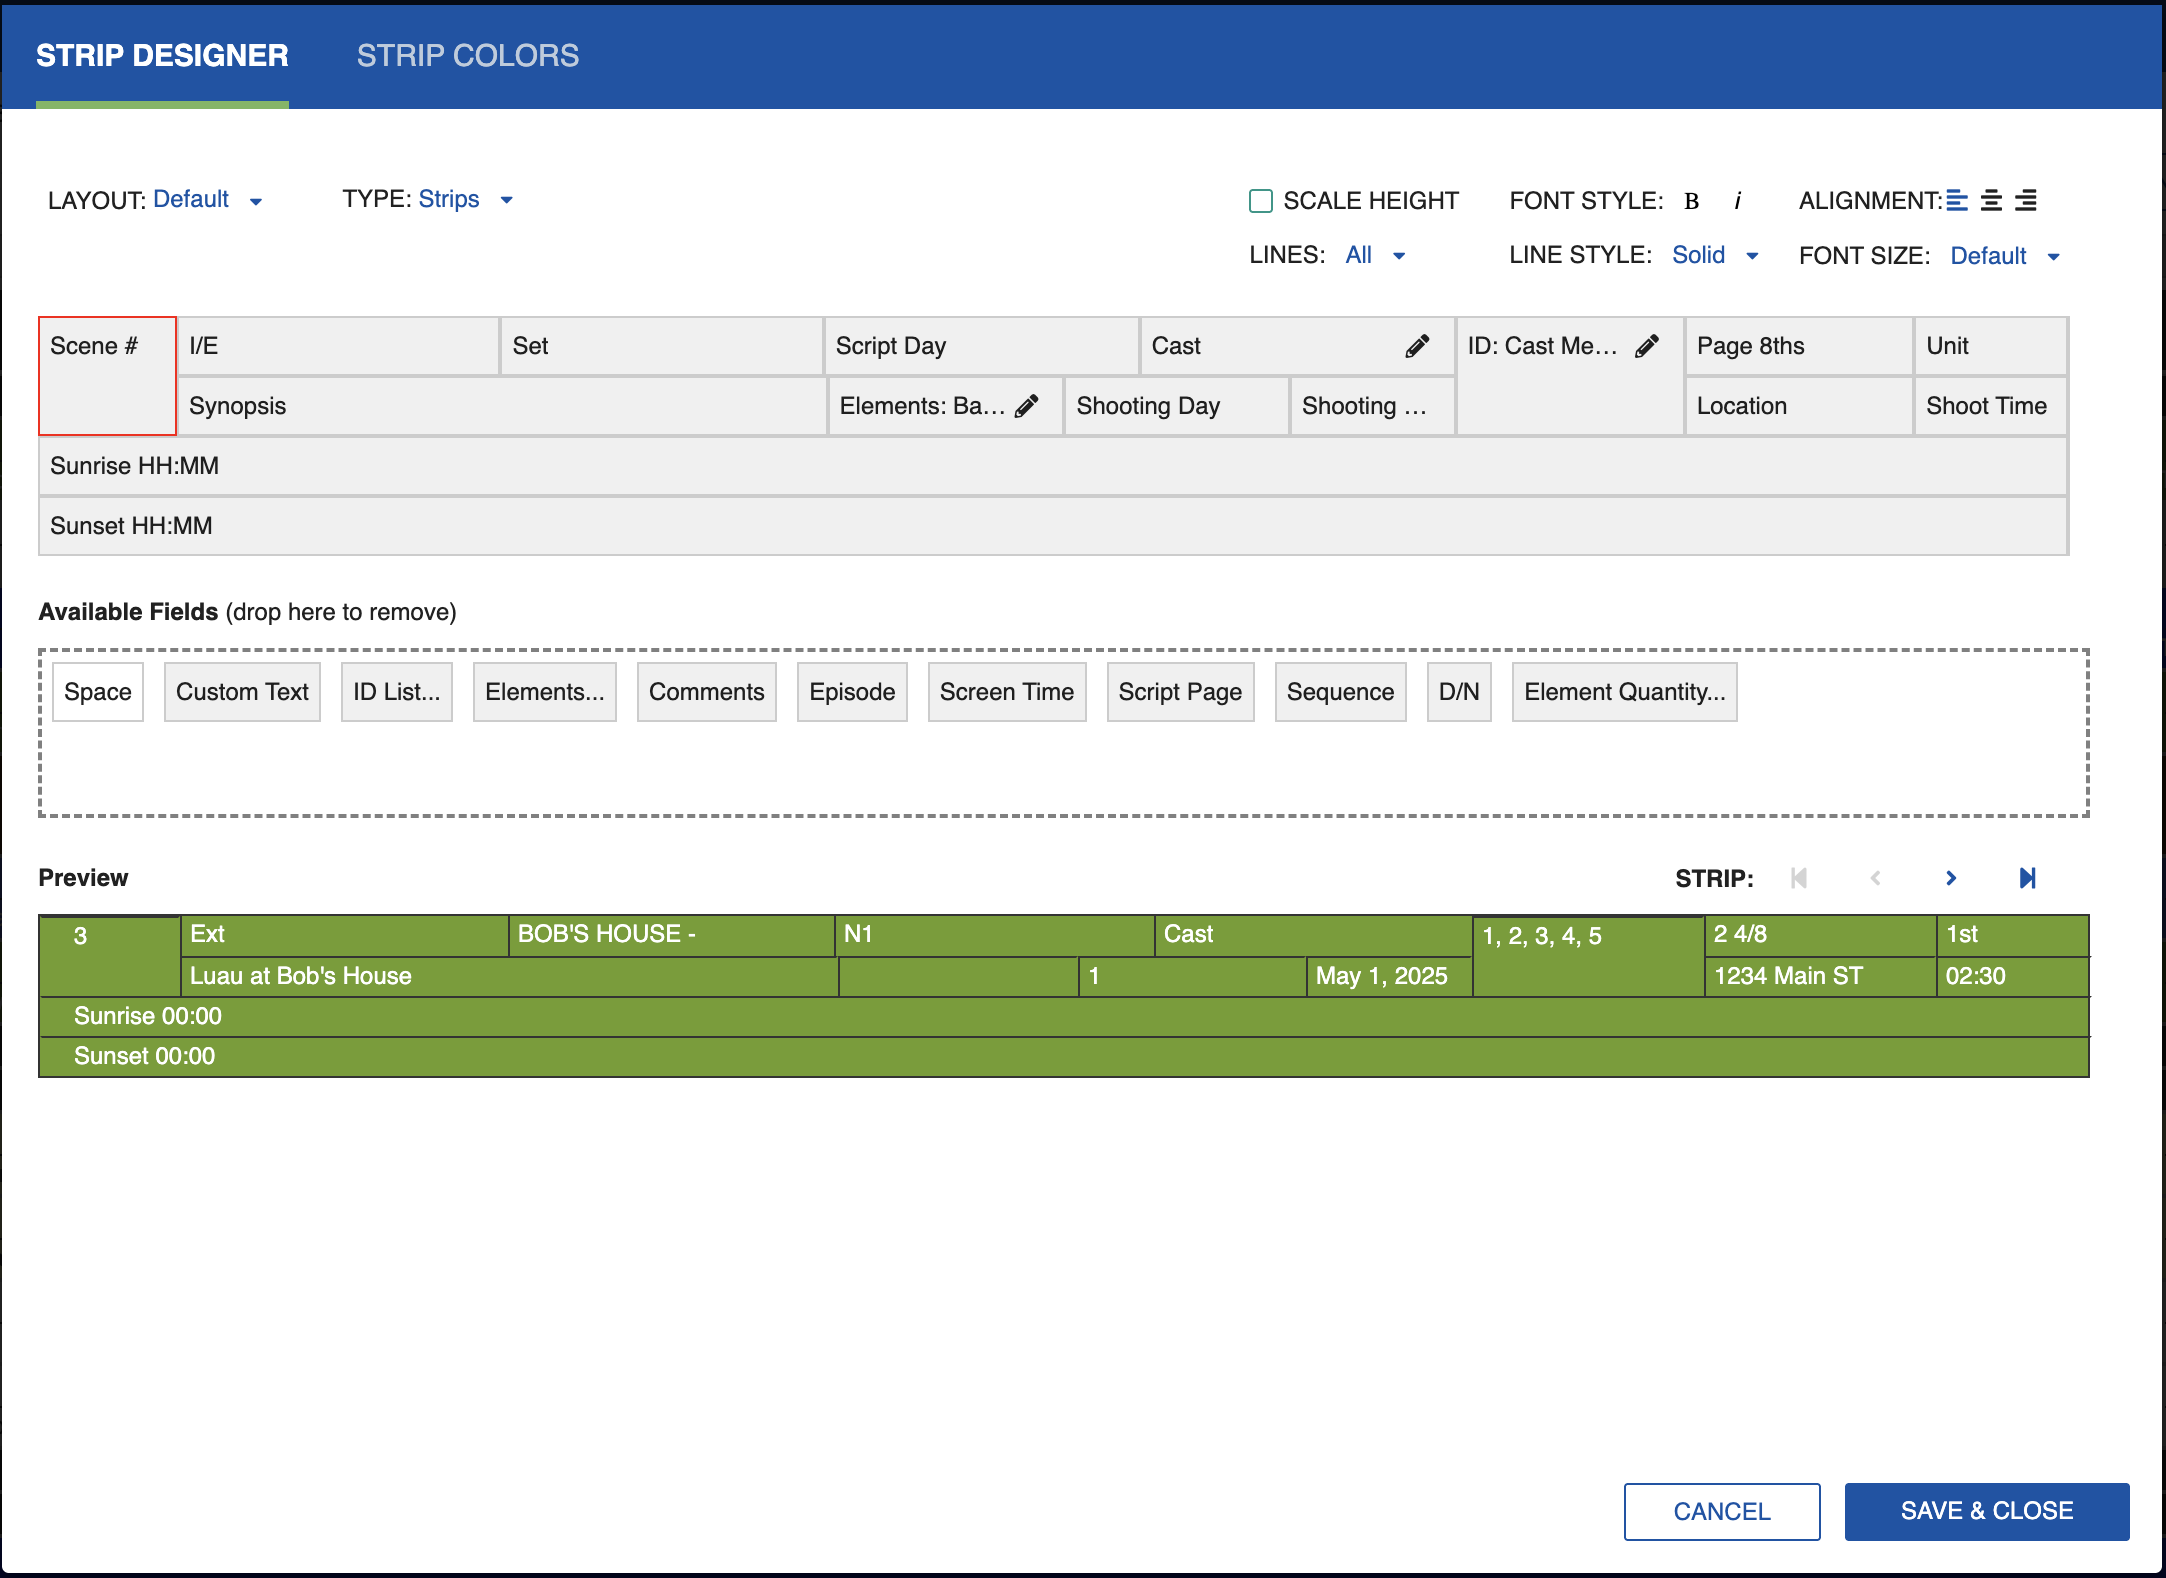
Customize the Strips Display
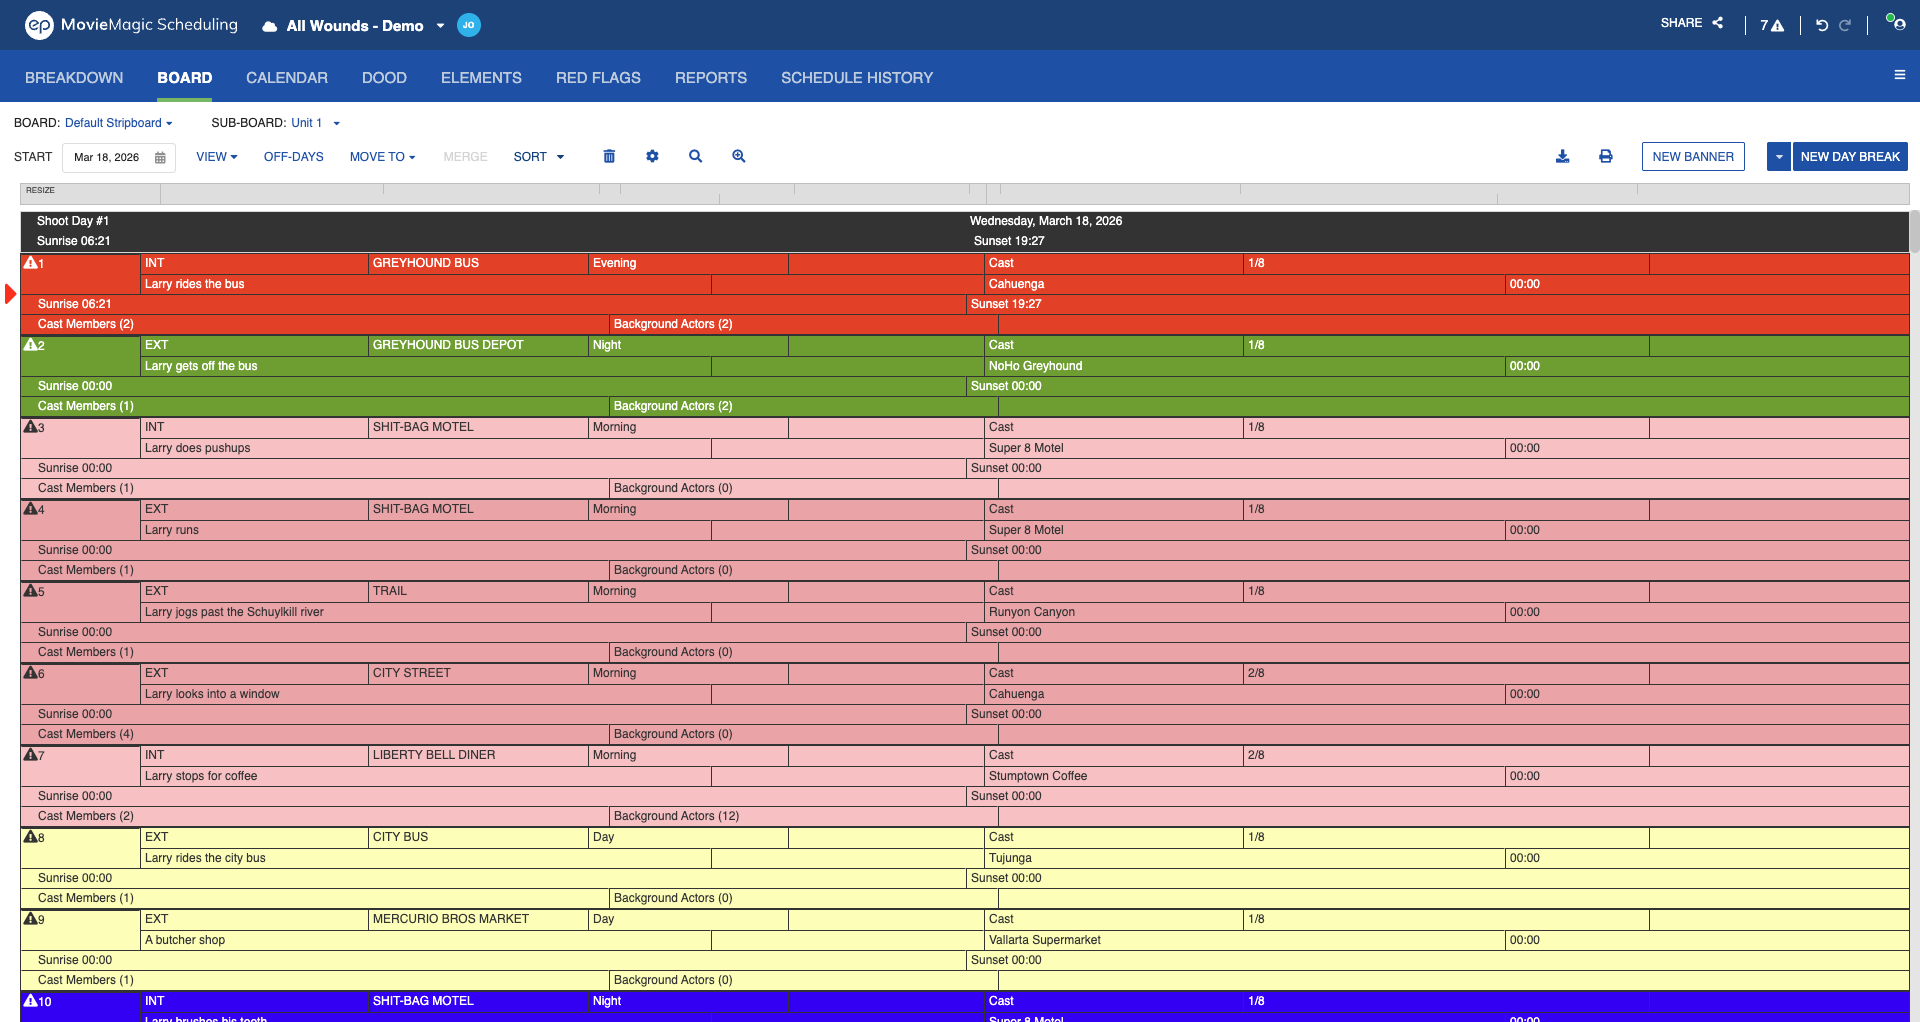
The different fields available for a strip are: Scene #, I/E, Set, Element, Custom Text, Script Day, ID List, Pages, Script Page, Page 8th, Location, Unit, Shoot Time, Screen Time, Space, Episode, Sequence, Shooting Date, Shooting Day, D/N, Element Quantity, Sunrise, Sunset, Comments.
Note
D/N appears by default in the Board, One-line Schedule, Shooting Schedule, and Daily Category designers.
To customize the Strip Layout, drag and drop the fields as needed from the Available Fields panel to the customize panel.
Note
When adding Element, ID List, or Element Quantity, select the category to be displayed after dragging the field onto the strip.

Note
When adding Custom Text, type the text in the text field after dragging the field.

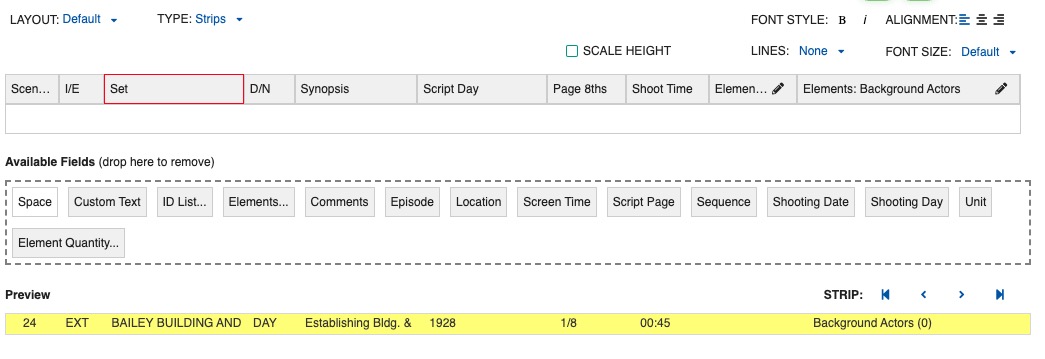
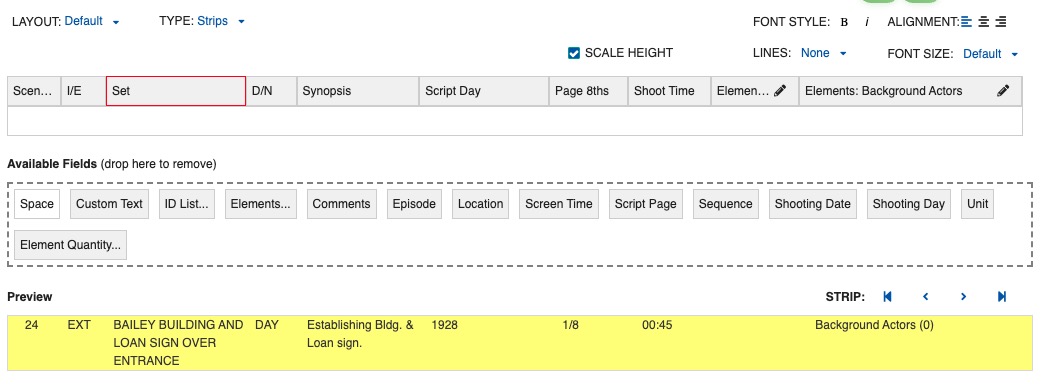
You can adjust the columns in the preview by hovering and dragging the red borders between cells. You can adjust in width and in height. This can also be done in the Board itself.


Scale height displays the full text of the element. The Strip will automatically resize its height as needed.
Font Size
The Font Size dropdown offers six options: Default, Small, X-Small, Medium, Large, X-Large.
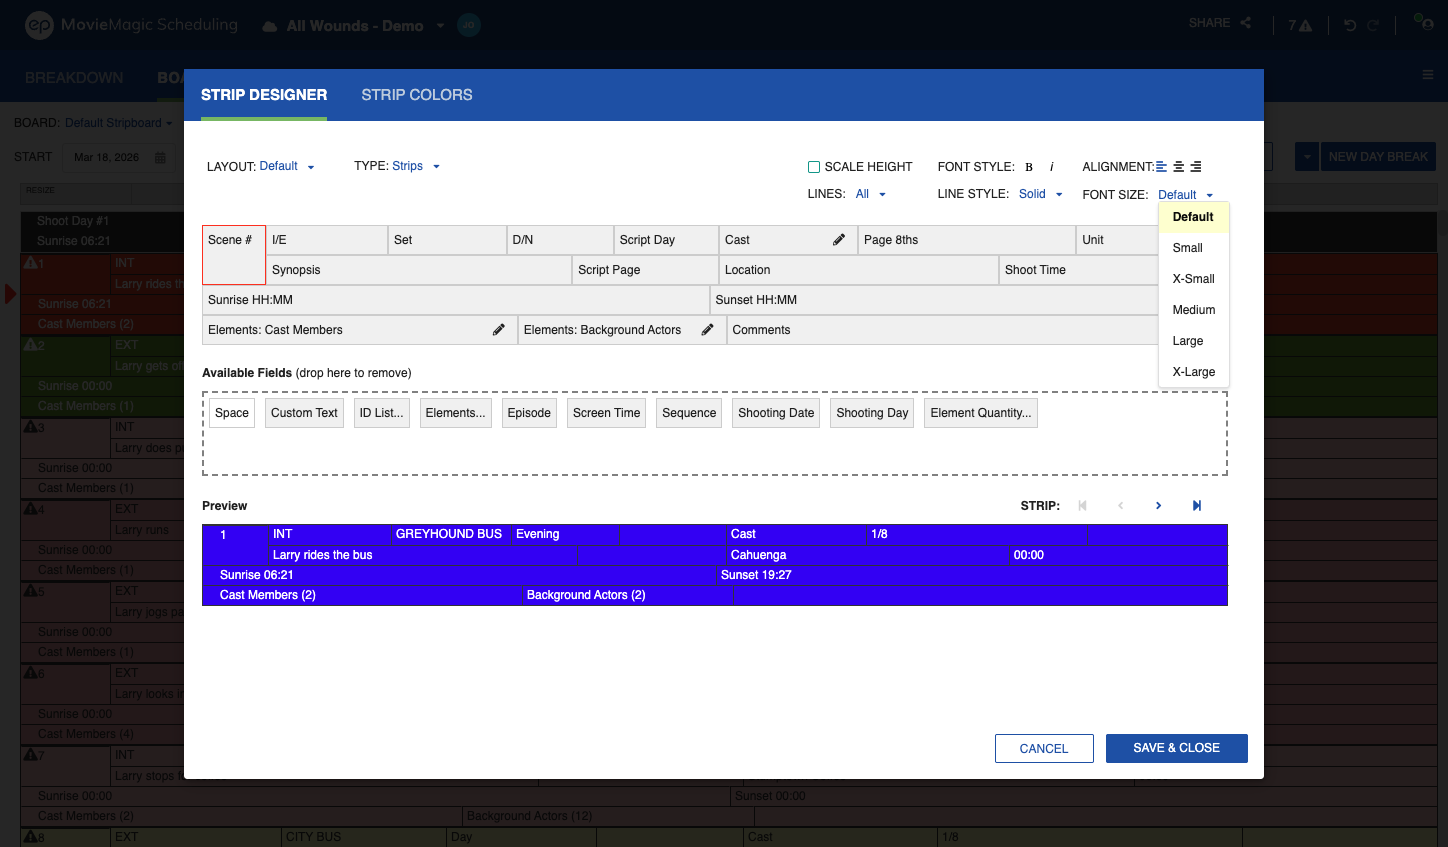
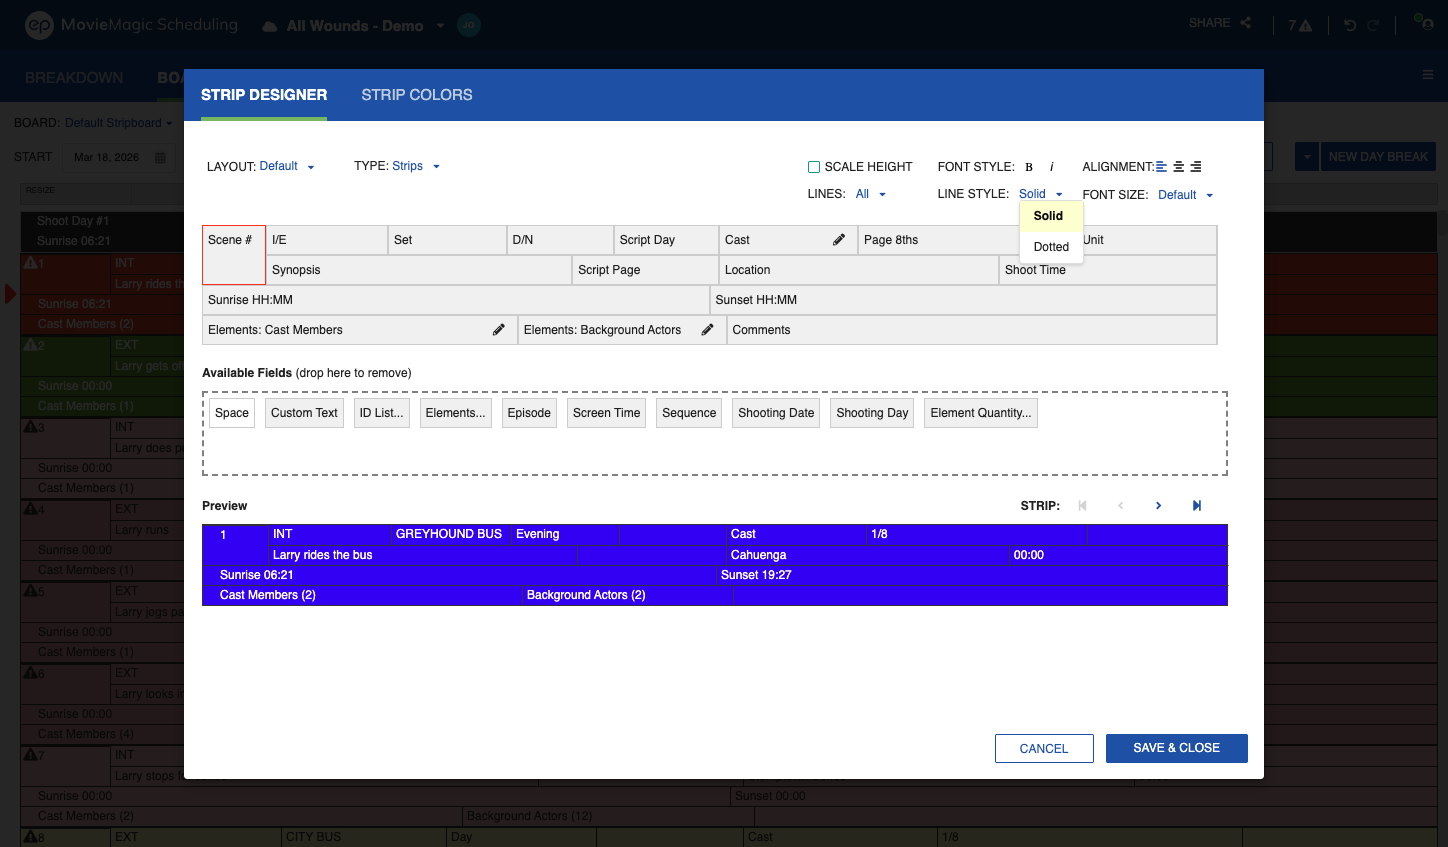
Line Style
The LINE STYLE dropdown sets whether row separators appear as Solid or Dotted lines. LINE STYLE works alongside the LINES dropdown (None, All, Vert). When LINES is set to None, LINE STYLE is disabled.
Strip Rows
Strips support up to four rows of fields. Drag fields from the field list into rows three and four to display additional information without widening the strip.
After making your selections, click Save & Close. Your Strip layout will be saved as a part of your Schedule.
Below the setup table is a Strip layout preview. Navigate from strip to strip by clicking on the arrows.
More to know about customizing Strip displays:
- If you place the same item in two cells next to each other, the cells merge.
- Green in the setup table indicates two cells merged vertically. Blue indicates two cells merged horizontally.
- You cannot merge both vertically and horizontally.
- With any cell selected, you can choose SCALE HEIGHT TO CONTENT, which will wrap data in the cell and increase the cell size so that all data is visible in every Strip. You can also change the alignment of the data in the cell (left, center, or right alignment).
- Your Strip layout will be saved as a part of your Schedule.
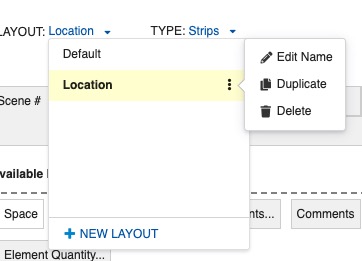
Create Layout
On top of the window, click on the Layout drop-down menu, then click + NEW LAYOUT.
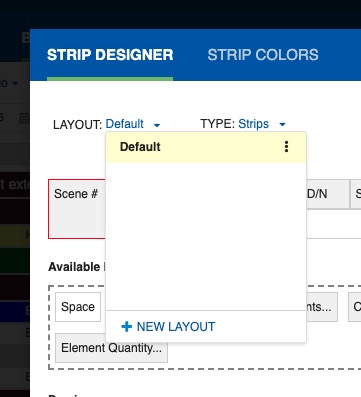
Name the Layout.
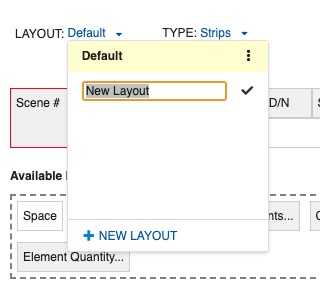
To edit a Layout, click the three dots next to the name of the layout. There you can Edit Name, Duplicate, or Delete a Layout.
Note
The Layout selected in the Edit window will be the one displayed on your Board. To change the display of your Board, go back to the Design window and select another Layout.
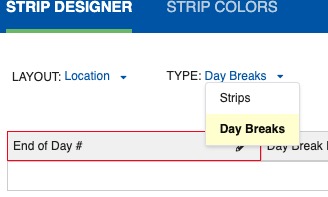
Day Breaks
You can customize the display of the Day Breaks from the Strip Designer. In the TYPE drop-down menu, select Day Breaks.
Day Break Fields
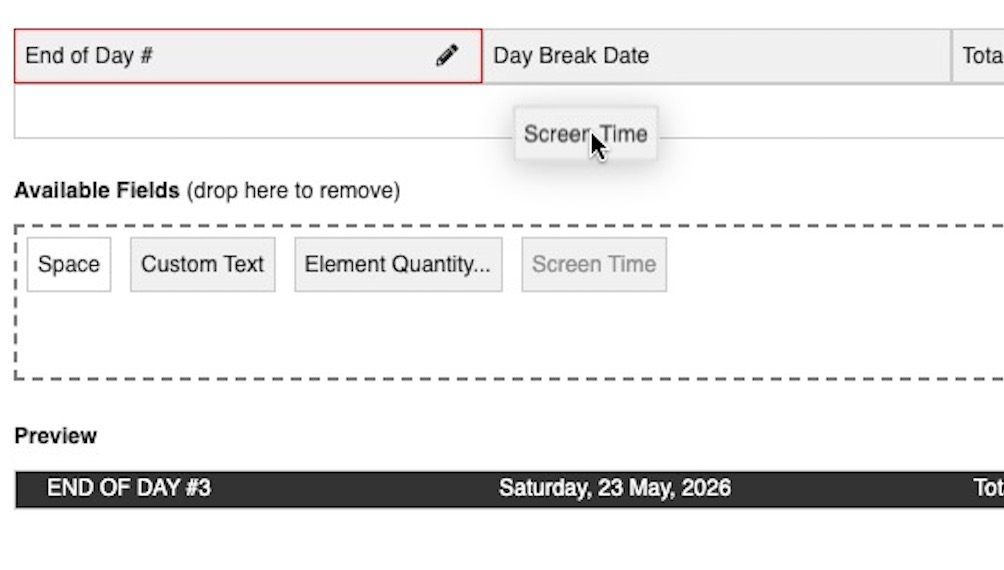
The fields available for a Day Break strip are:
- End of Day #: Automatically shows the Shooting Day.
- Day Break Date: Automatically shows the Shooting Date.
- Total Pages: Automatically sums the page count for the day.
- Estimated Time: Automatically sums the Shoot Time for the day.
- Screen Time: Automatically sums the scenes' screen timing for the day.
- Element Quantity: Automatically sums the total of a selected element category for the day.
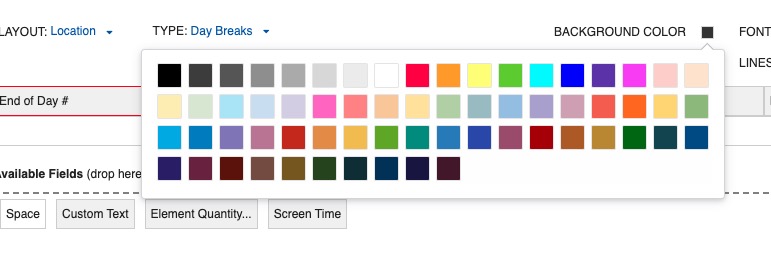
- Sunrise: Displays the earliest Sunrise value entered across breakdown sheets on that day.
- Sunset: Displays the latest Sunset value entered across breakdown sheets on that day.
- Space: Extra space between fields.
- Custom Text: Static text you define.
Drag and drop the fields as needed from the Available Fields panel to the customize panel.
Note
When adding Element Quantity, select the category to be displayed after dragging it onto the strip.

Sunrise and Sunset can each appear once per banner. The same field list is available on Shoot Day banners. See Shoot Days for details on the Shoot Day designer.
How Sunrise and Sunset Are Calculated
When Sunrise or Sunset is included on a Day Break banner, the displayed value is derived from the Breakdown Sheets scheduled on that day:
- Sunrise: the earliest Sunrise value entered across all Breakdown Sheets on that day.
- Sunset: the latest Sunset value entered across all Breakdown Sheets on that day.
- No values entered: the banner displays
00:00until a value is added to at least one sheet on that day.
The displayed values update as you add, remove, or edit Breakdown Sheets on that day. See Scene Header Information for how to enter Sunrise and Sunset on a Breakdown Sheet.
Day Break Layout
Adjust the columns in the preview by hovering and dragging the red borders between cells. Select if you want lines between cells. Select the color for the background of the Day Break.
Note
The text color will automatically adapt: black for light backgrounds, white for dark backgrounds.
Select the font size, alignment, and font style. Click Save & Close. The Day Break layout will be saved as a part of the Schedule.
Day Breaks support up to four rows, the same as standard strips.
See Day Breaks for how to add and manage Day Breaks on the Board.
Shoot Days
Shoot Day strips display the production's shoot-day count above each Day Break. They are managed separately from Day Breaks in the Strip Designer, but the two strip types work together on the Board: each Shoot Day strip is linked to the Day Break beneath it.
How Shoot Day Strips Behave on the Board
A Shoot Day strip appears above each Day Break, showing Shoot Day # [sequence] FULLDAY, MONTH DD YYYY.
- The Shoot Day strip and its Day Break move together. The Shoot Day strip cannot be moved independently.
- When a Day Break is moved to the Boneyard, its Shoot Day strip shows
Shoot Day #without a sequence count.
Customize the Shoot Day Display
In the Strip Designer, select Shoot Day from the TYPE dropdown.
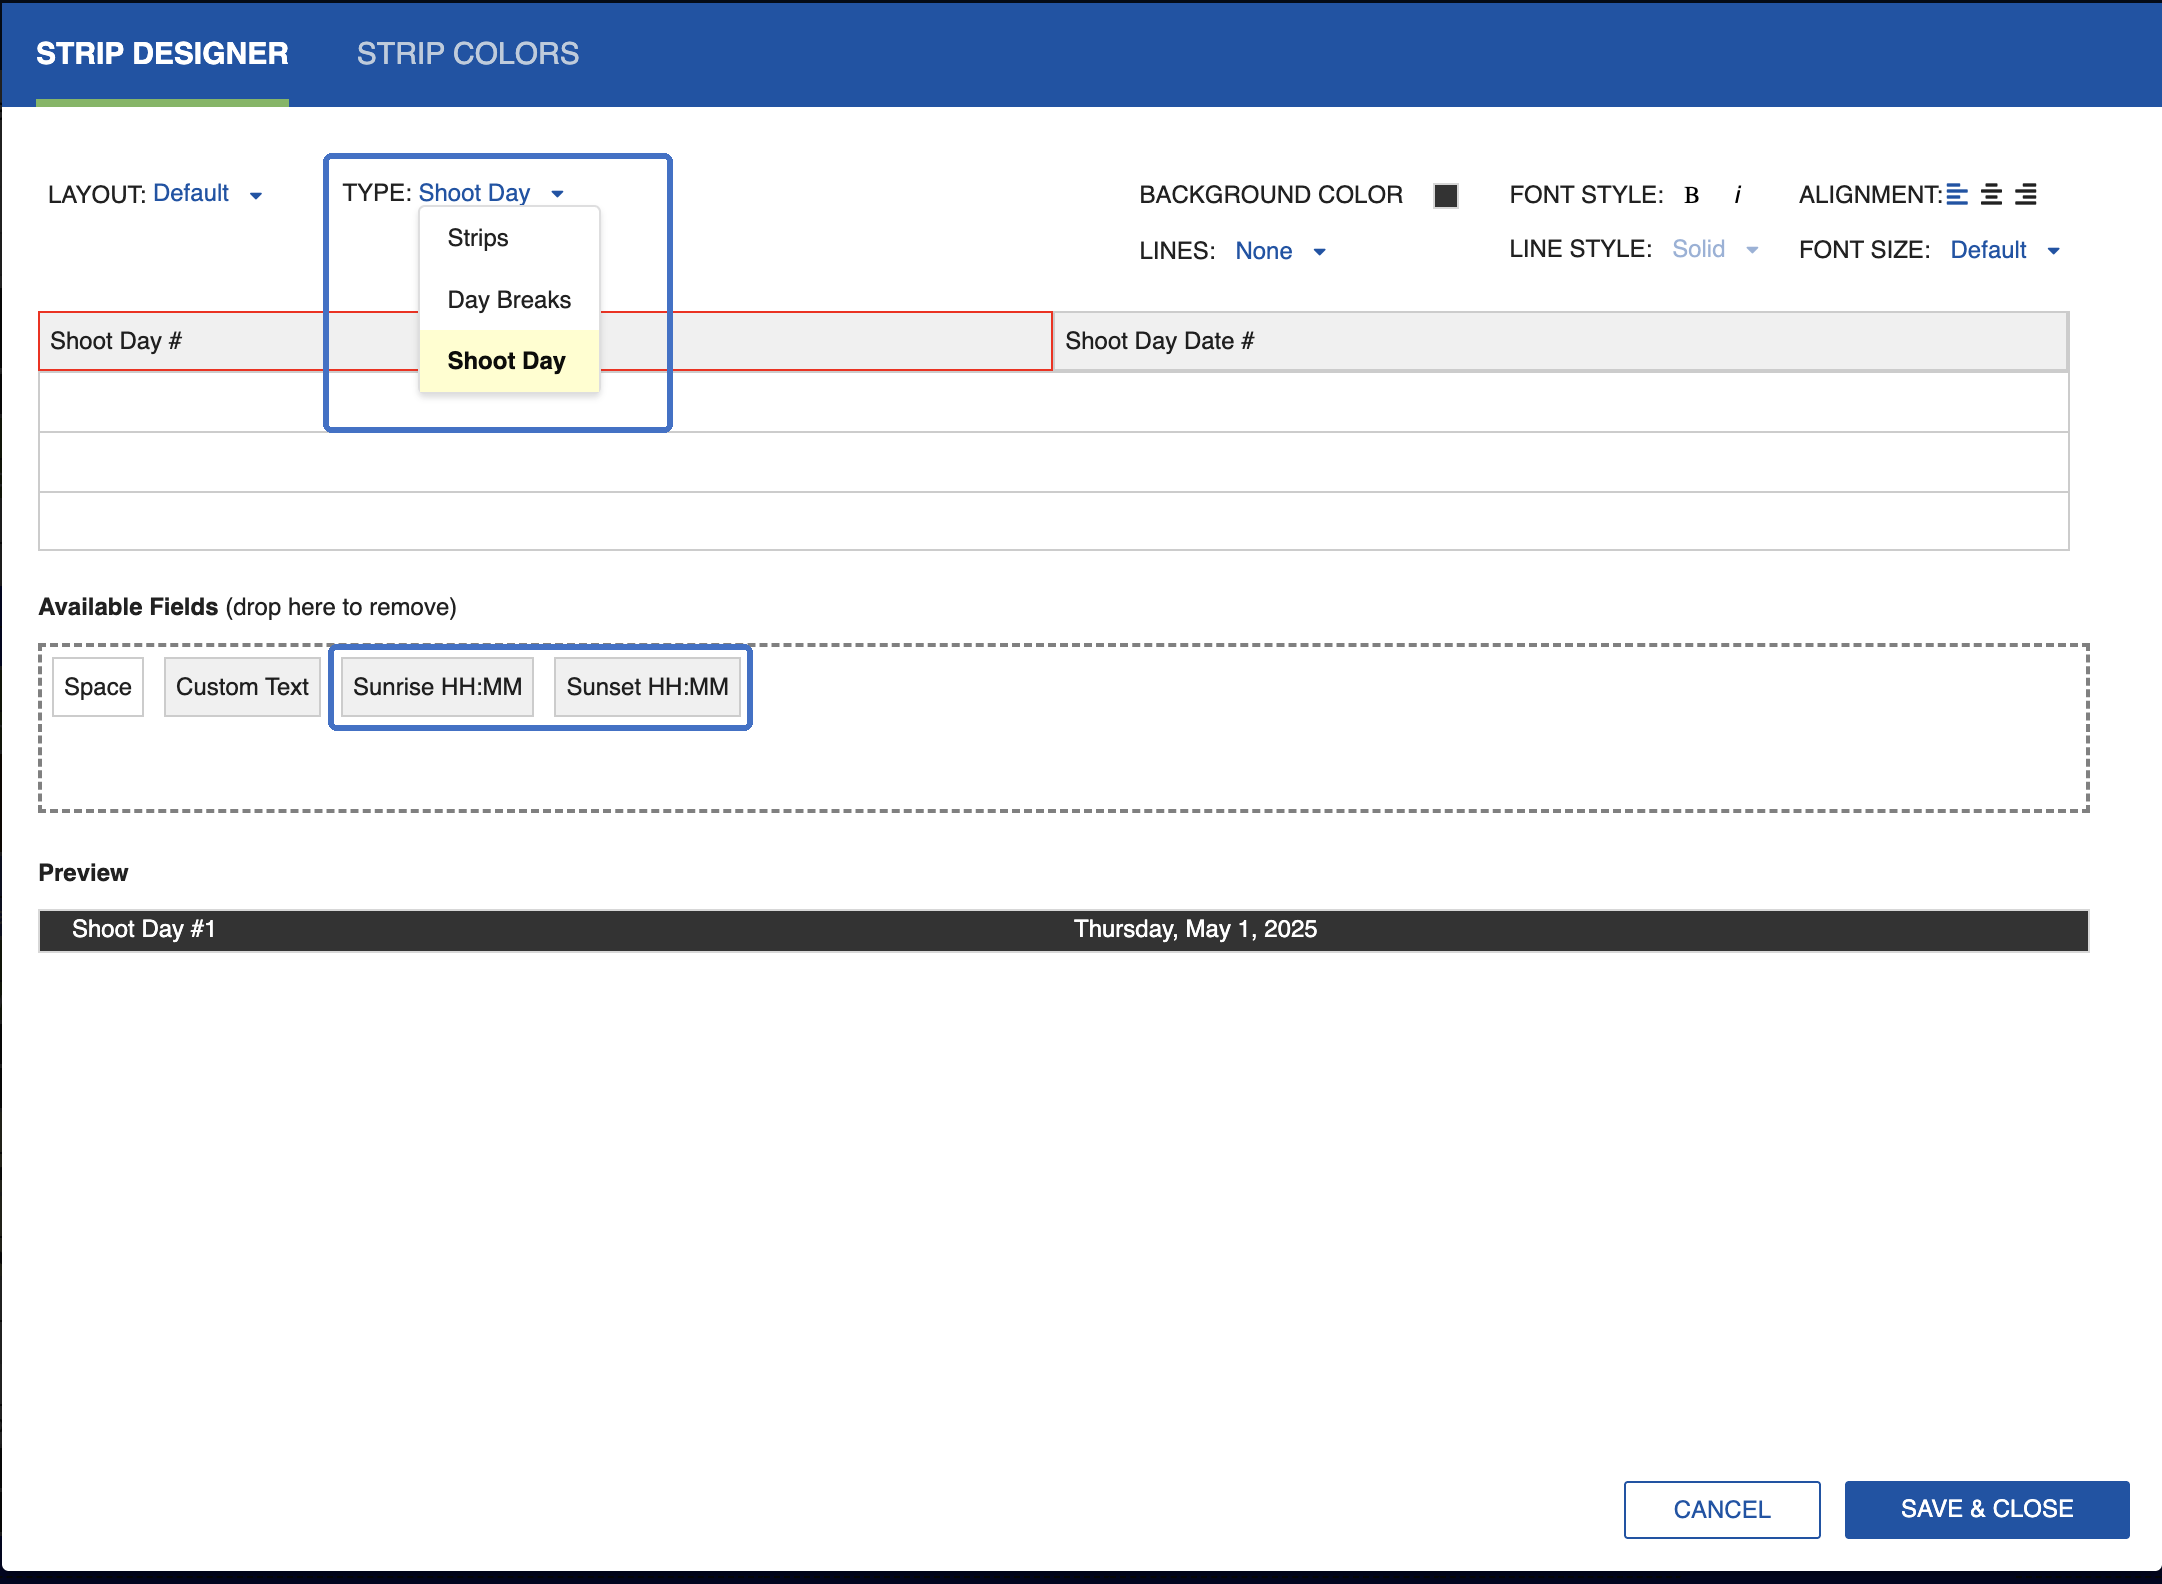
The Shoot Day designer mirrors the Day Break designer. By default, Shoot Day strips display with a black background and white text.
Shoot Day Fields
Shoot Day strips share the same Available Fields panel as Day Breaks (see Day Break Fields above), including Sunrise, Sunset, Custom Text, Screen Time, Space, and Element Quantity. Sunrise and Sunset can each appear once per banner.
Drag fields from the Available Fields panel onto the strip to include them. Drag fields off the strip to remove them.
Click Save & Close to apply your Shoot Day layout to the Schedule.
Strip Color
Strip colors can be customized in the STRIP COLORS tab within the Strip Designer Window. Assign colors by scene header field values to make your Board easier to read at a glance.
Click on the STRIP COLOR tab.

For each Time of Day, select the color by clicking on the color box on the right.
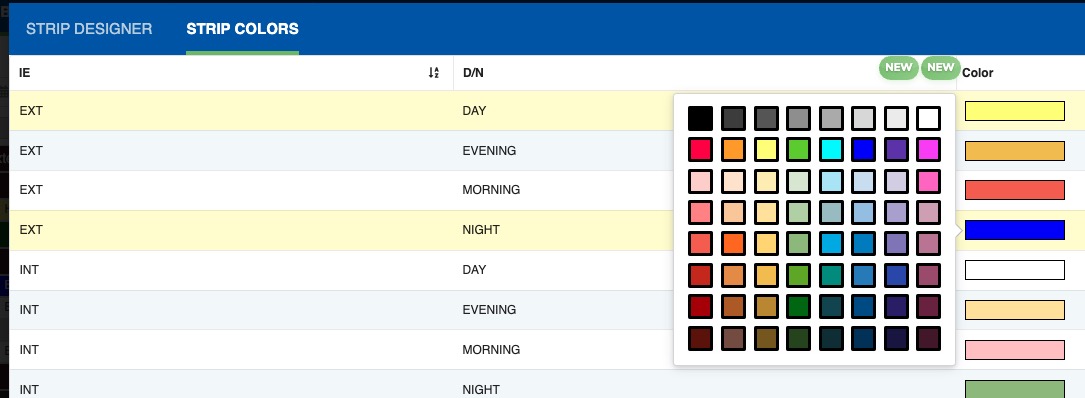
Click Save & Close.