Managing Elements
With a selected Category in the Elements tab, the Element table will be displayed on the right.
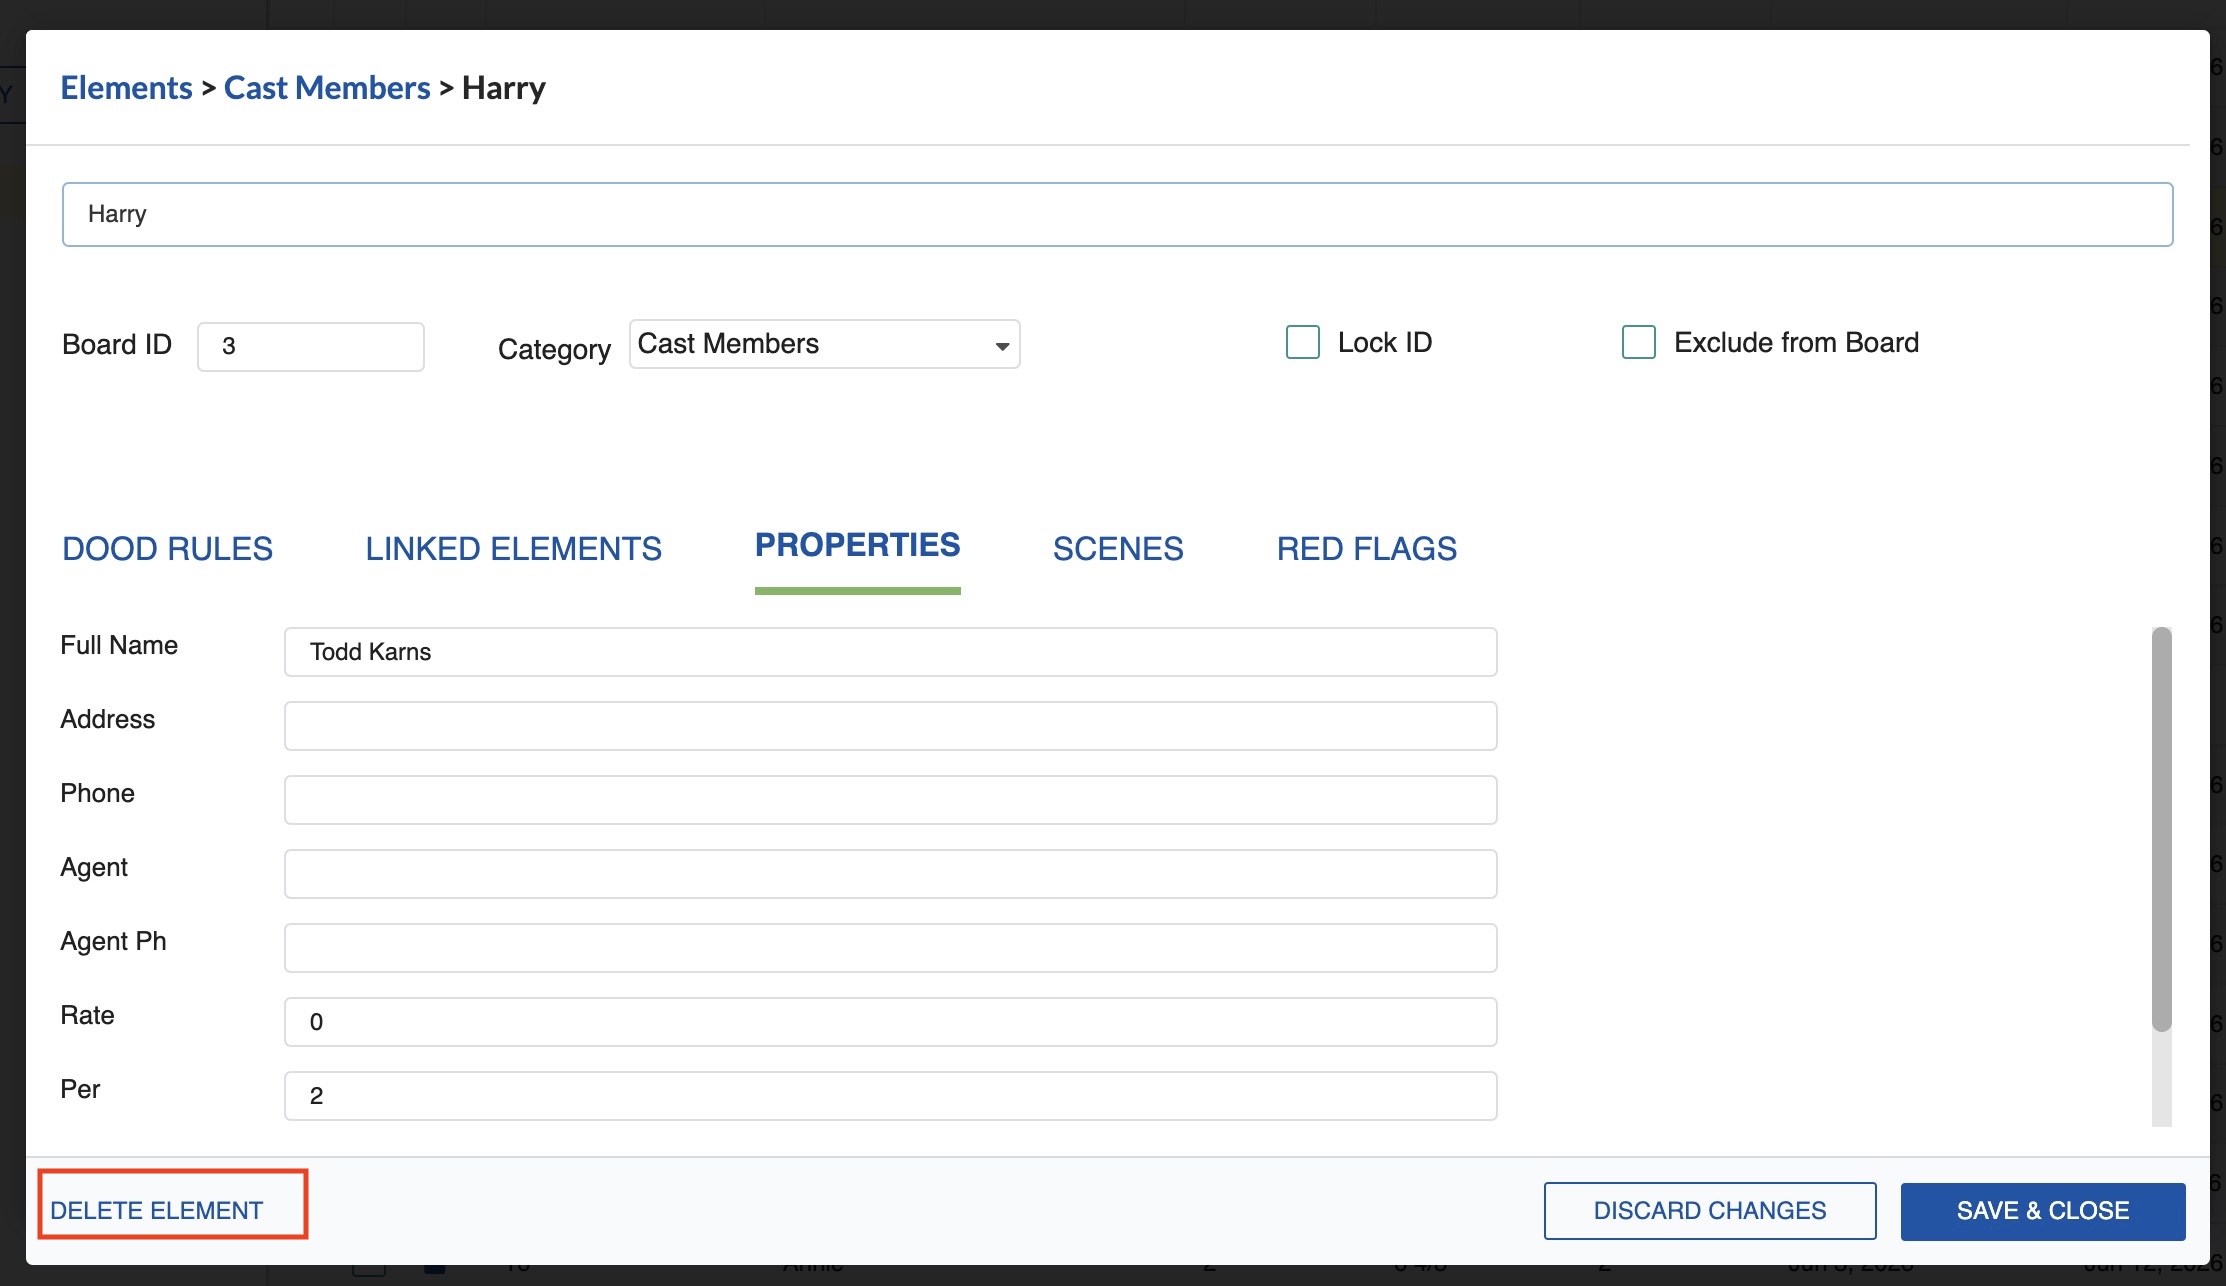
Edit an Element
-
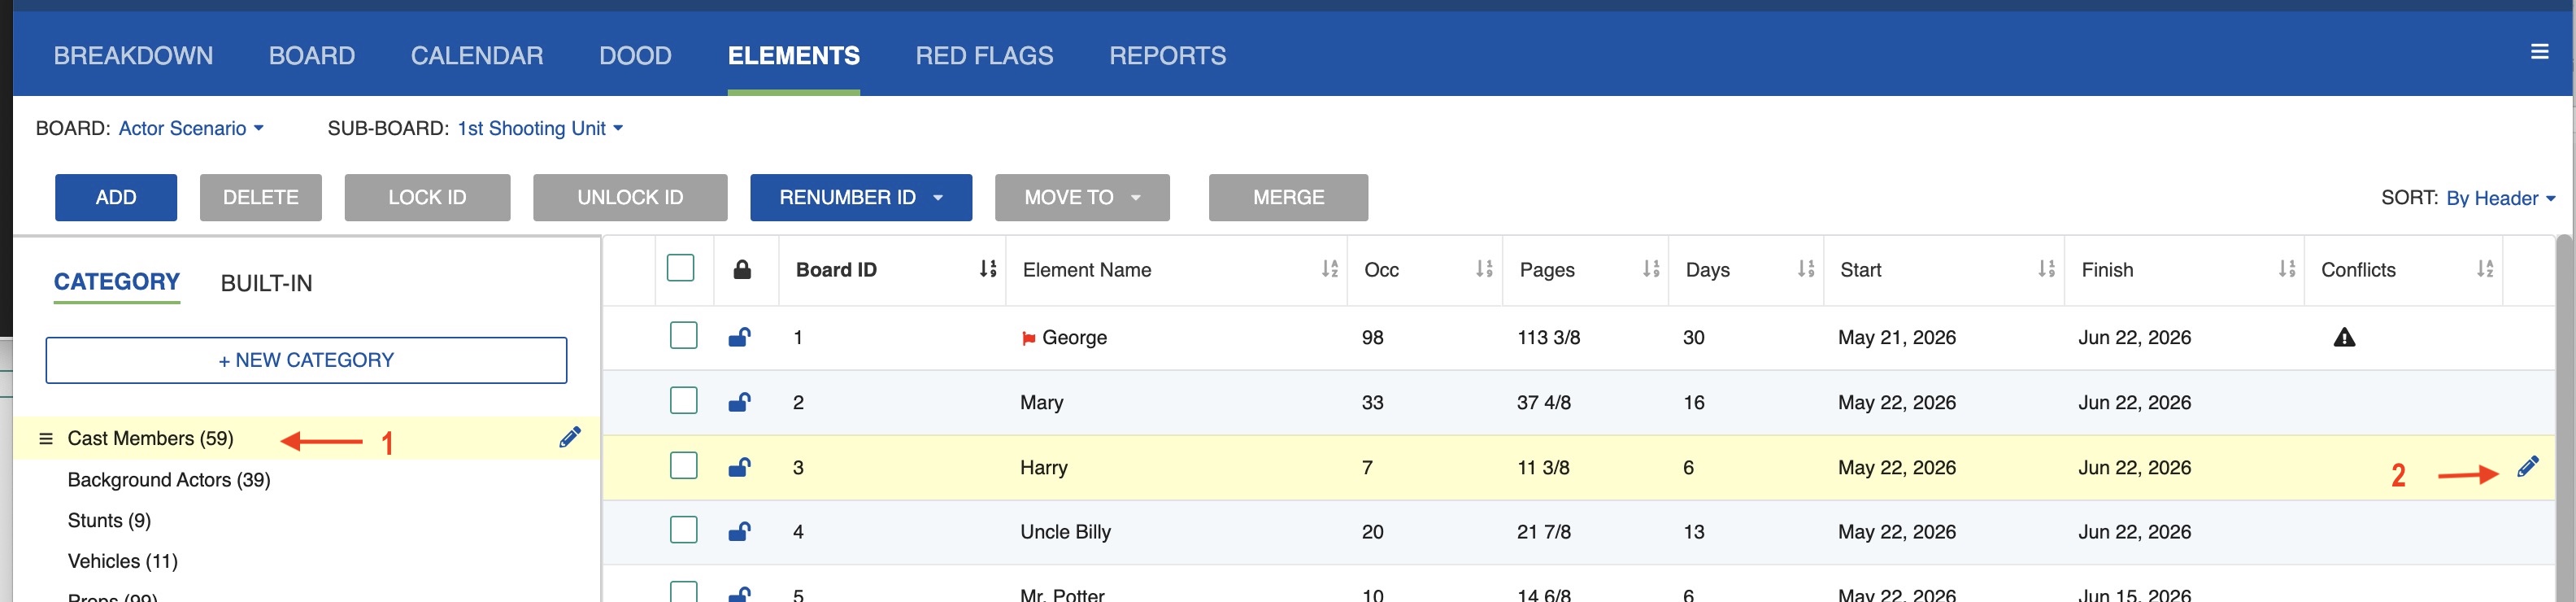
Click the Element name and then click the Edit (pencil) icon at the far right (or double-click the Element).
-
Make your changes.
- Click Save & Close.
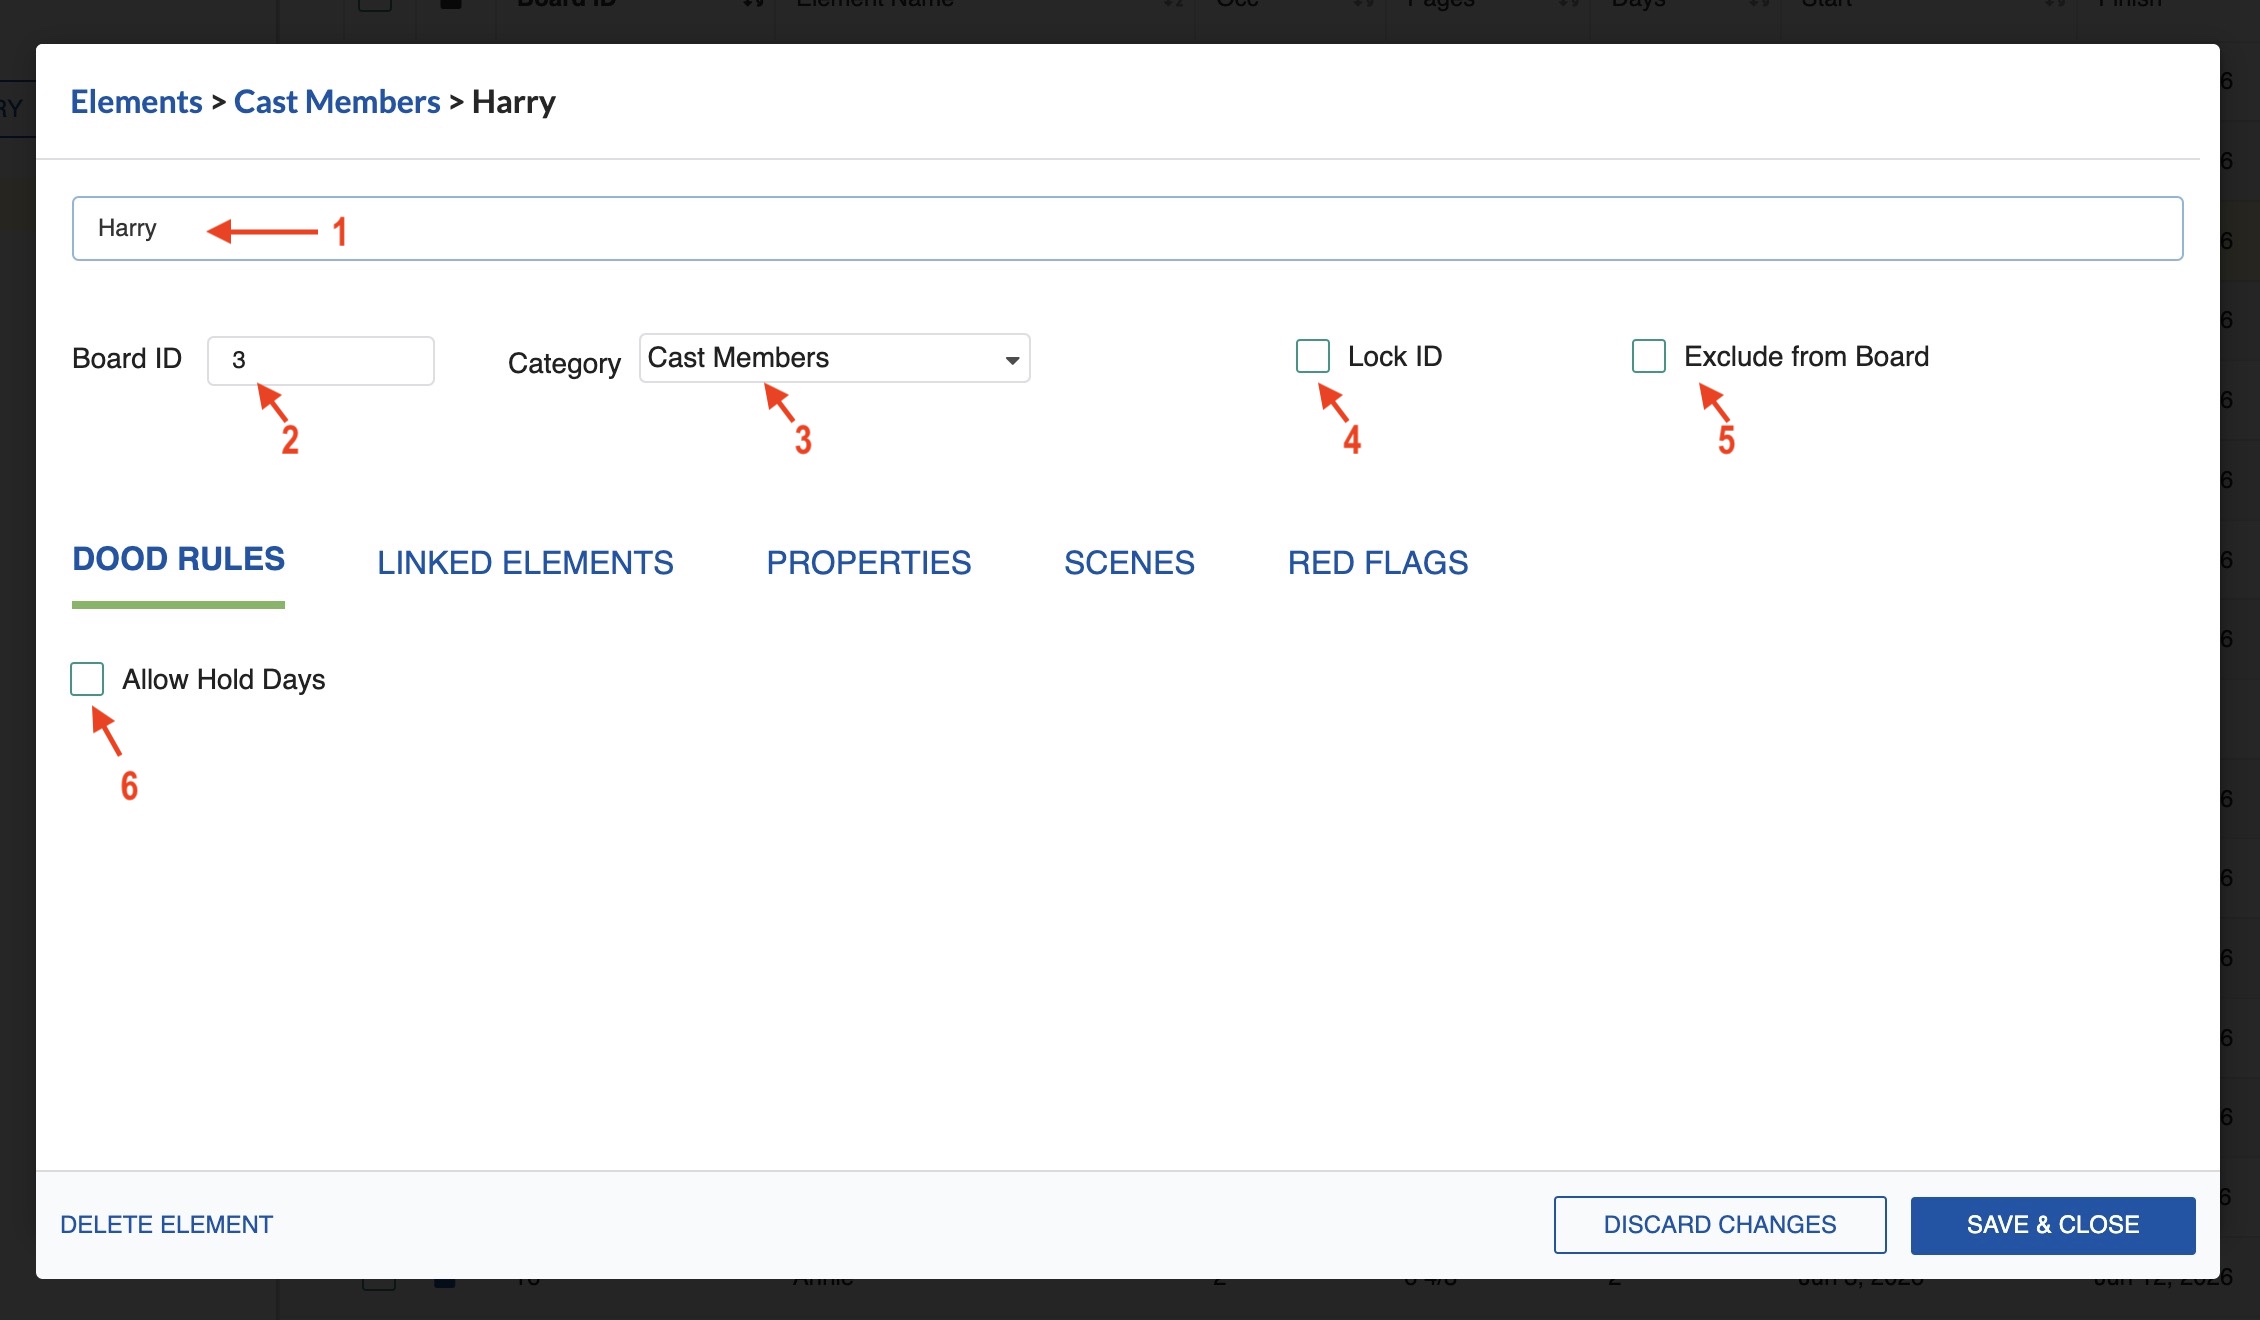
In the element's properties window, you can also edit the Board ID, move it to another Category, lock the ID, or exclude it from the Board. In the DOOD tab, you can allow or restrict held days.
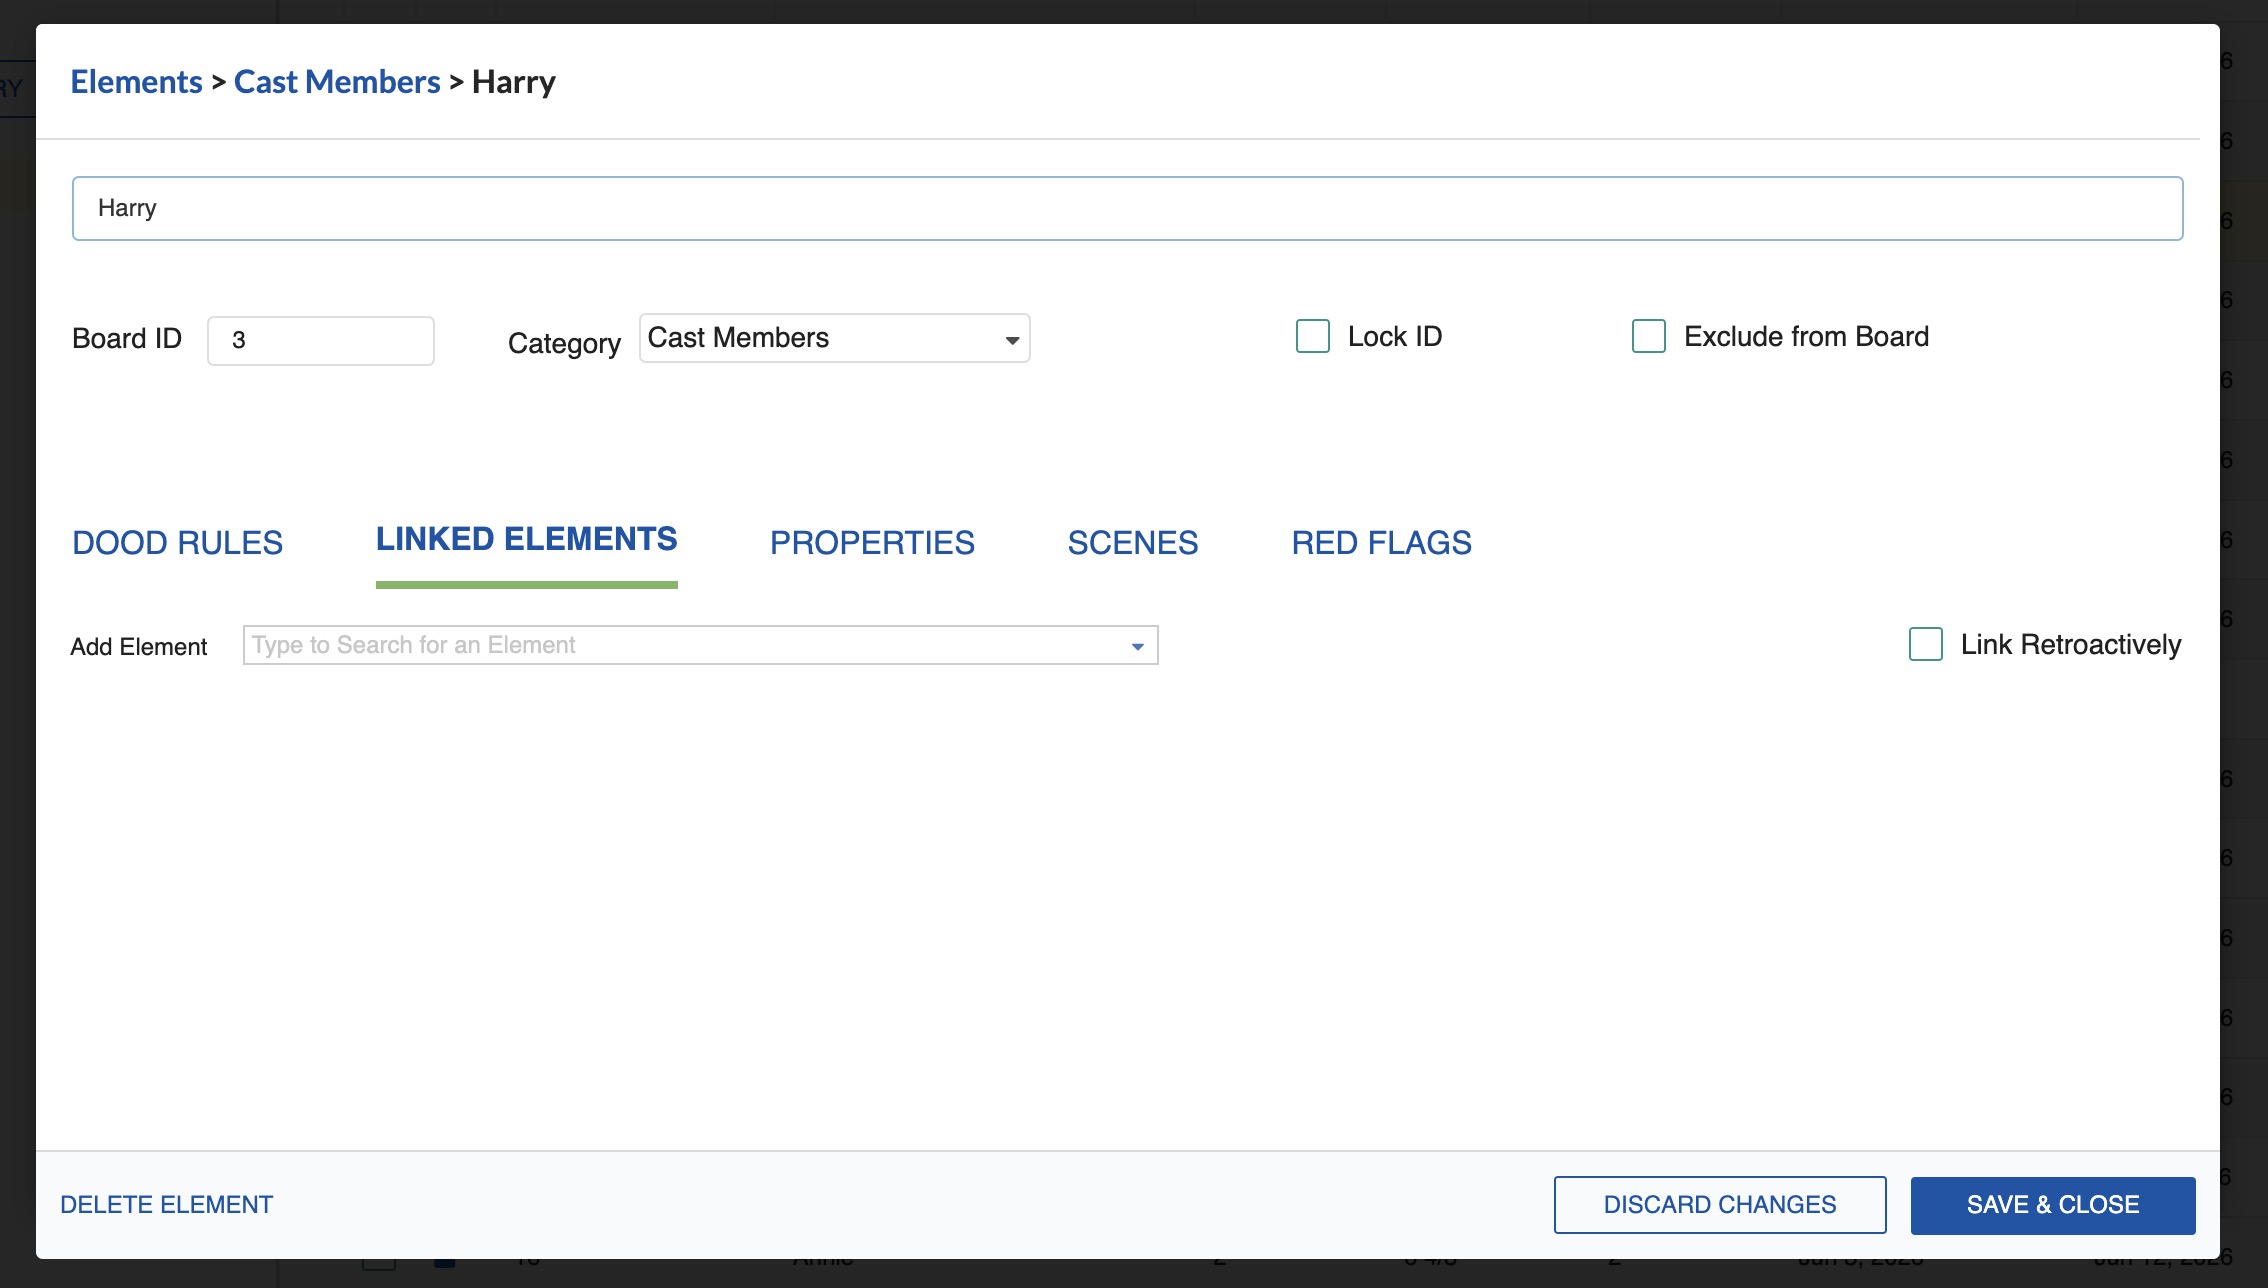
In the Link Element tab, you can link the element to another. See Linking Elements.
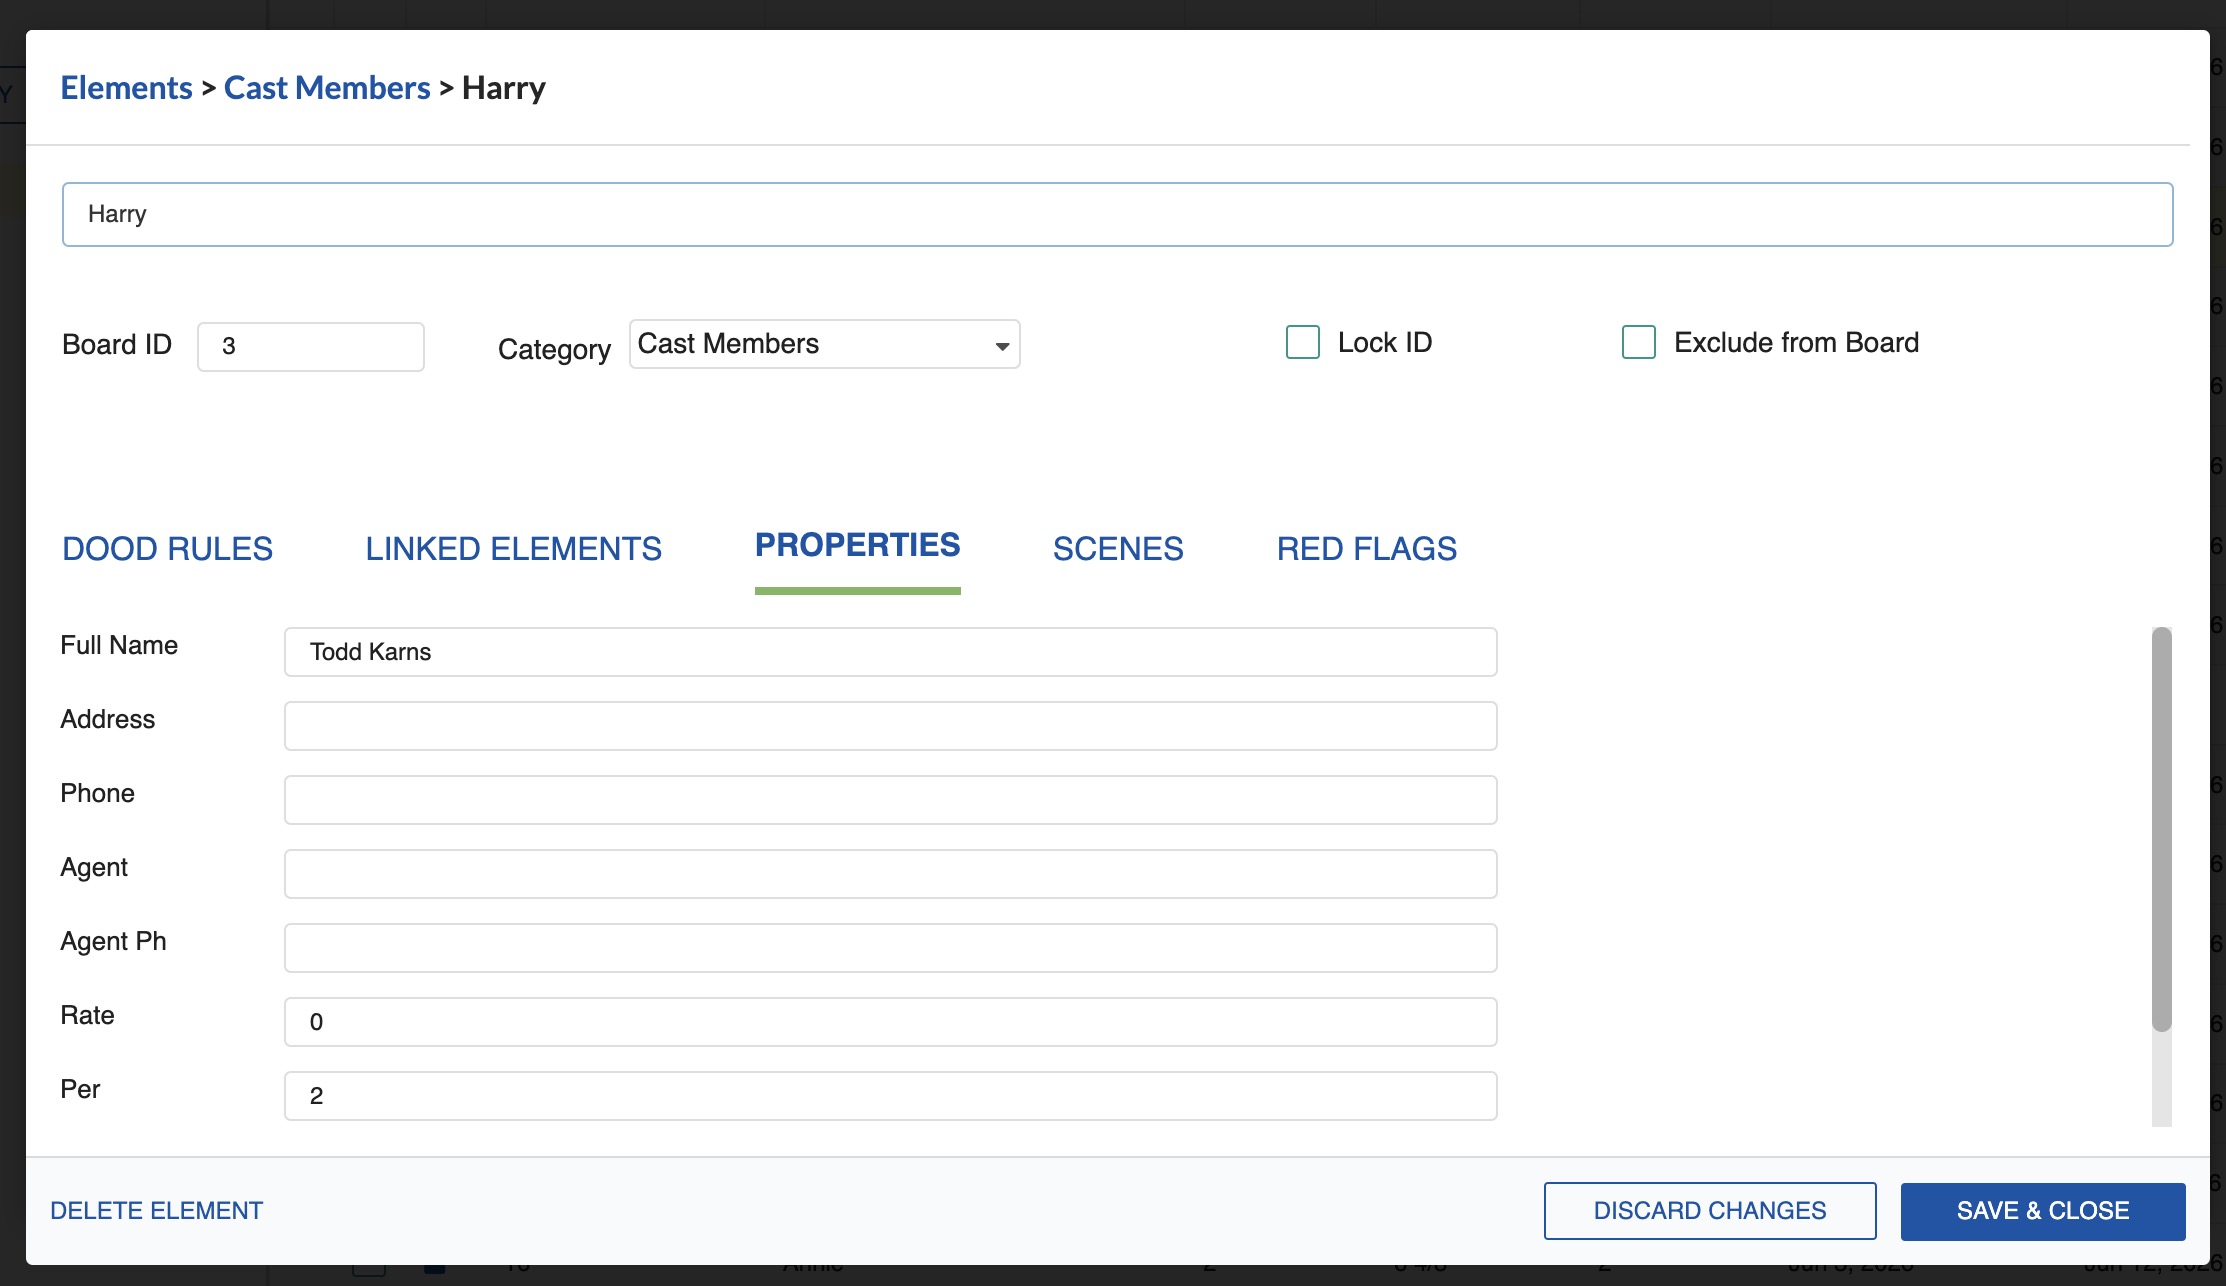
In the Properties tab, enter the information for that element.
Days & Dates Tab
The Days & Dates tab in the Edit Element modal shows when the Element works on the active Sub-Board. It pulls the same data as the Day-Out-of-Days table without leaving the Element you're editing.
To view:
- Open the Edit Element modal (click the Edit icon, or double-click the Element).
- Click the Days & Dates tab.
The tab shows two rows:
- Top row: the Element's shoot days in sequential order, using End of Day sequence numbers. Red Flags and Events are excluded.
- Below: the Element's specific working dates, listed as the calendar dates where the Element has a worked status in the DOOD.
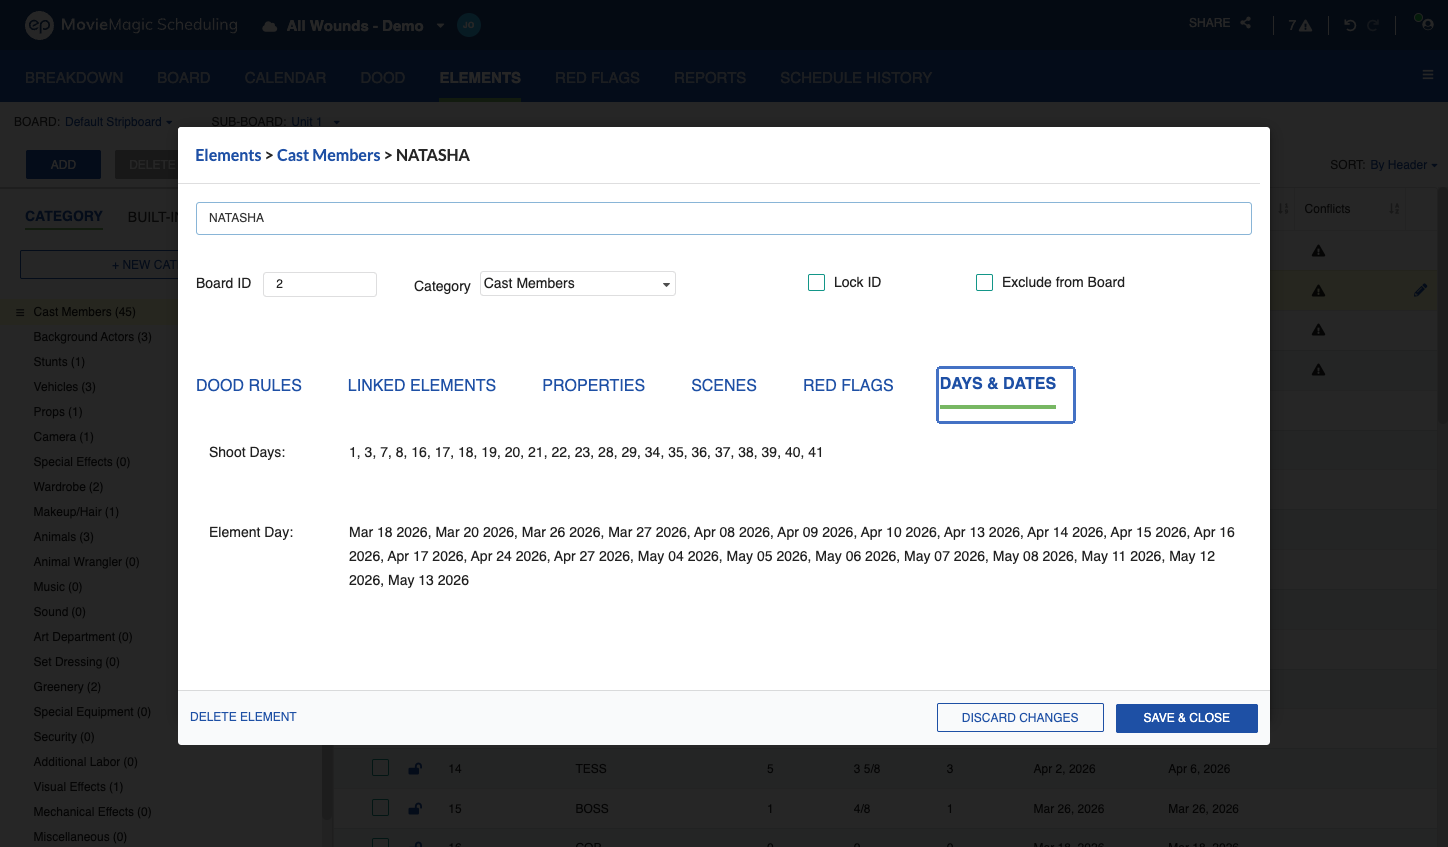
Note
Values are Sub-Board specific and use the date format set in System Preferences. A scrollbar appears if the content exceeds the modal's view height.
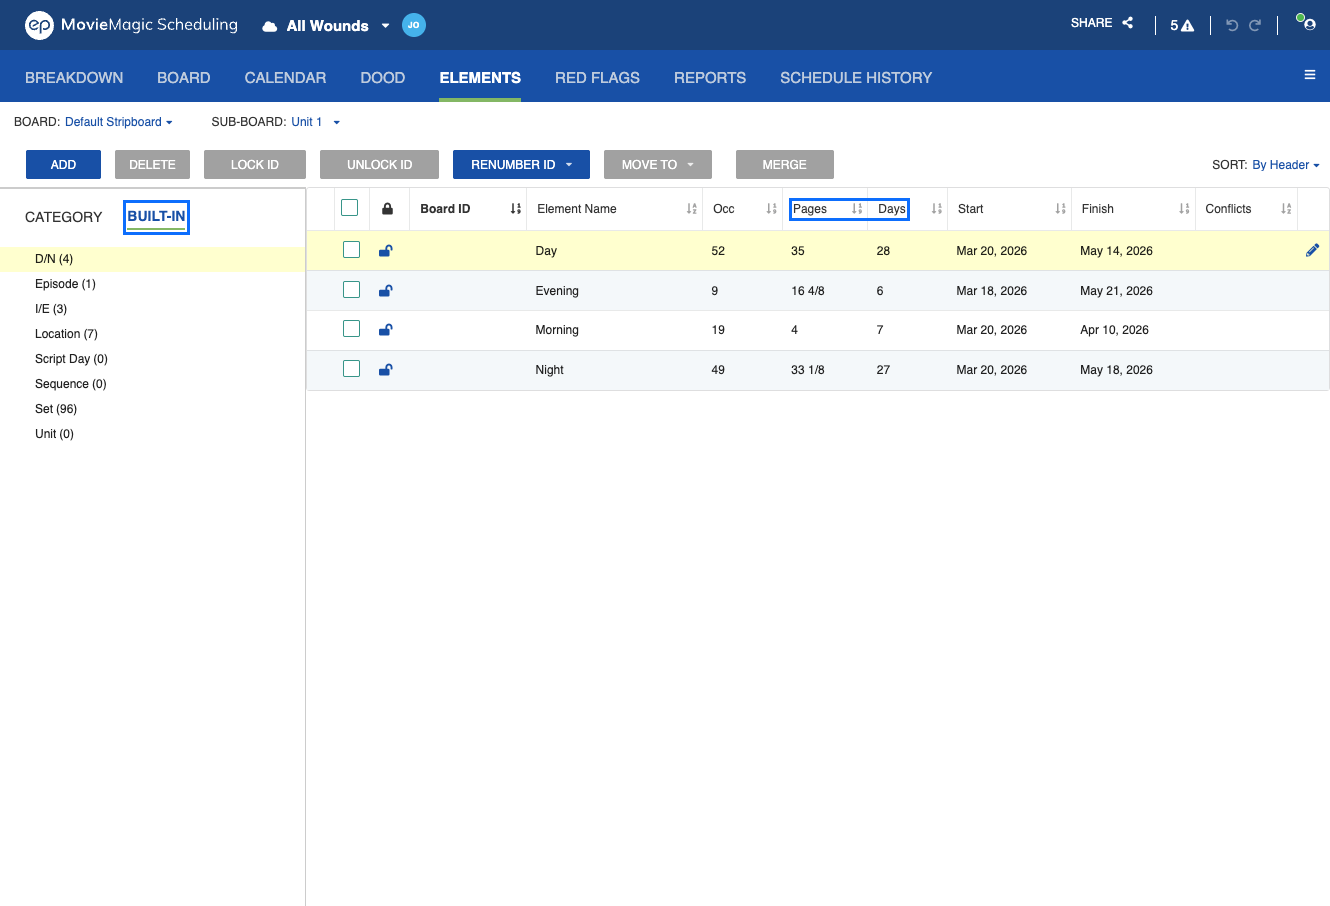
Built-in Category Element Data
For Elements in a Built-in Category (the Scene Header fields such as Set, Location, Unit, and Episode), the Elements table shows Page count and Days count alongside the existing fields. Occurrence values match the underlying schedule data. Where a field has no data, the cell shows an empty state.
Delete an Element
-
Click the Element name and then click the Edit (pencil) icon (or double-click the Element).
-
Click DELETE ELEMENT.
- The system will ask you to confirm. Click Delete Element to continue.
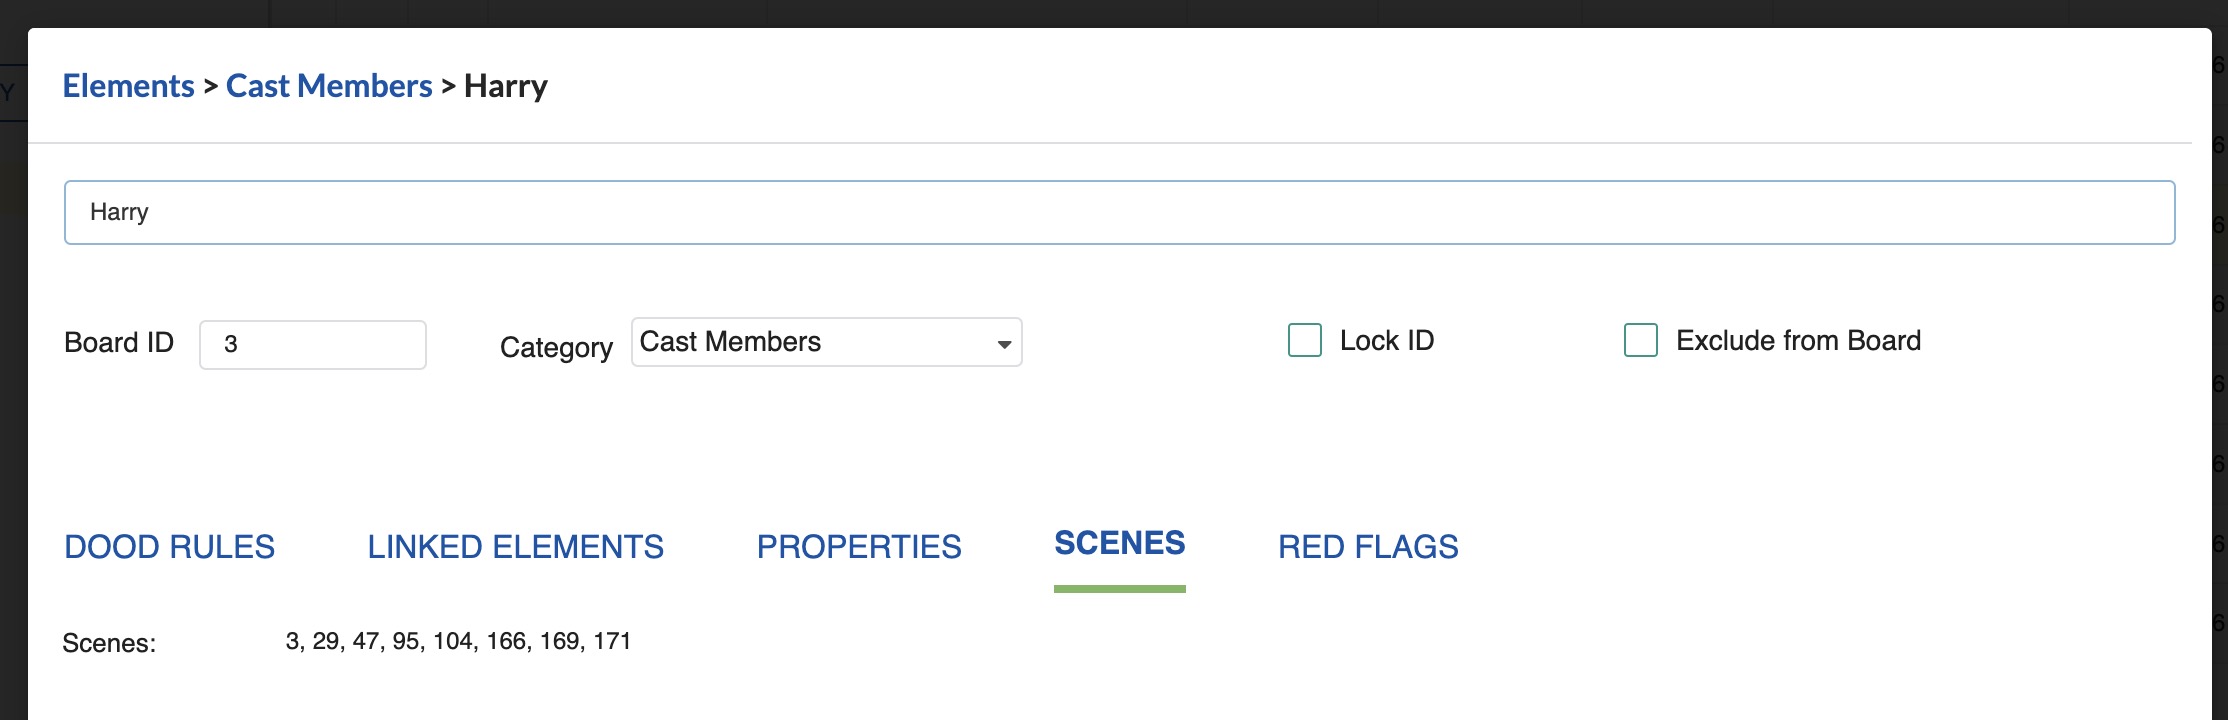
Scene Tab
The Scene Tab within the Element window shows all Breakdown Sheets that include this Element, along with their scheduled date in the active Sub-Board.
Red Flag Tab
The Red Flag Tab within the Element window shows any Red Flag events assigned to this Element. See Red Flag for more details.

Sorting Elements
To sort the Elements table:
-
Select SORT: By Header in the top bar and then click a column header to sort alphanumerically by that column.

-
Or select SORT: Custom in the top bar and then drag and drop Elements using the three-bar icon.

To Sort Elements from a Category Manually
- Select SORT: Custom in the top bar.
-
Drag and drop the Elements using the three-bar icon next to each Element name.
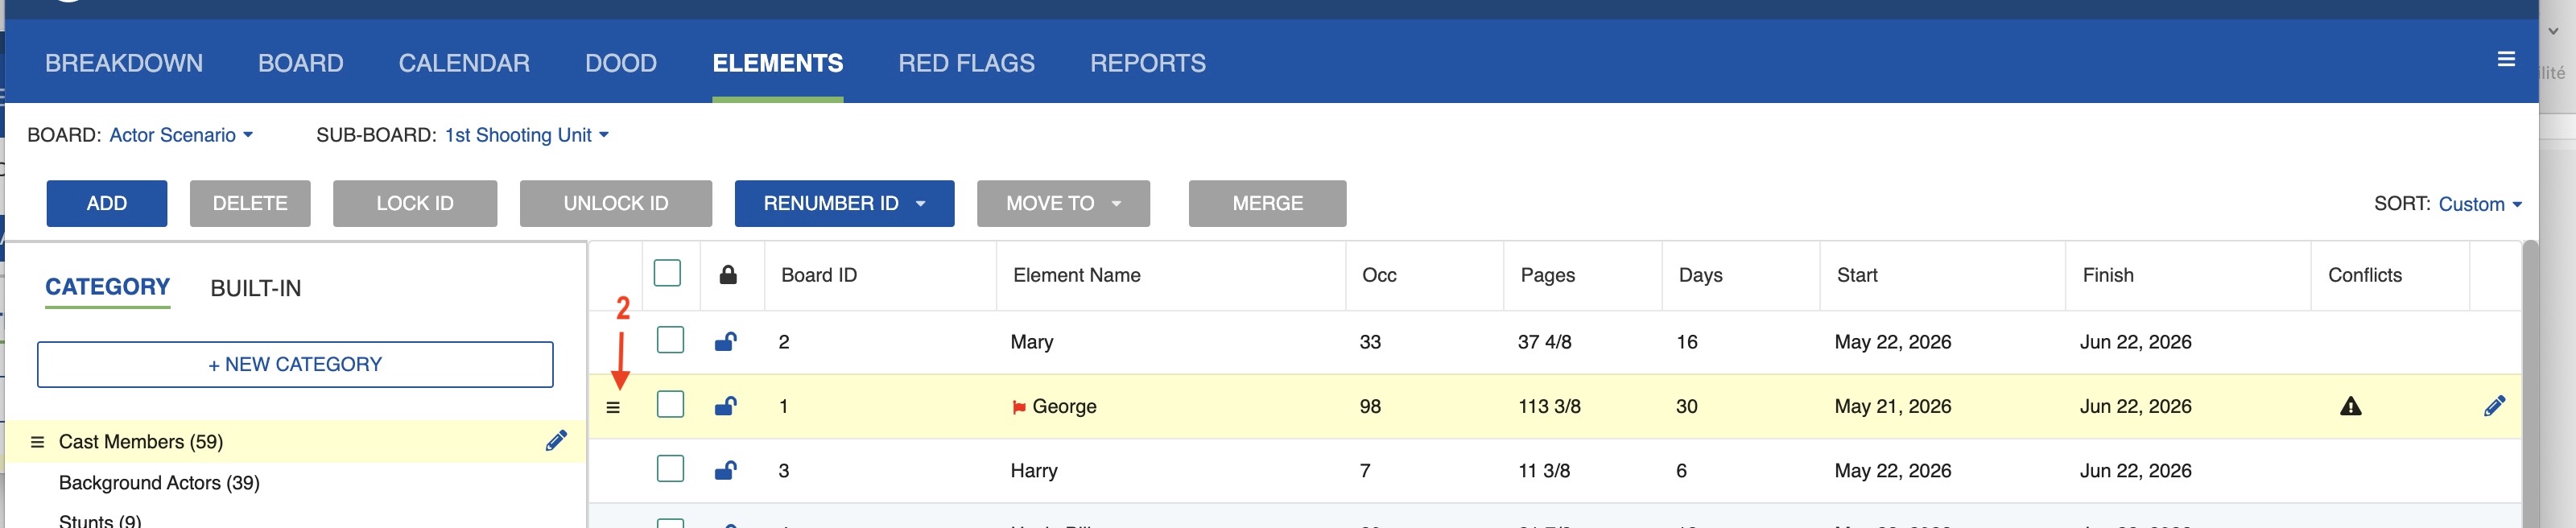
Numbering Elements
To automatically give the Elements in this Category a Board ID number:
-
Click Renumber ID.
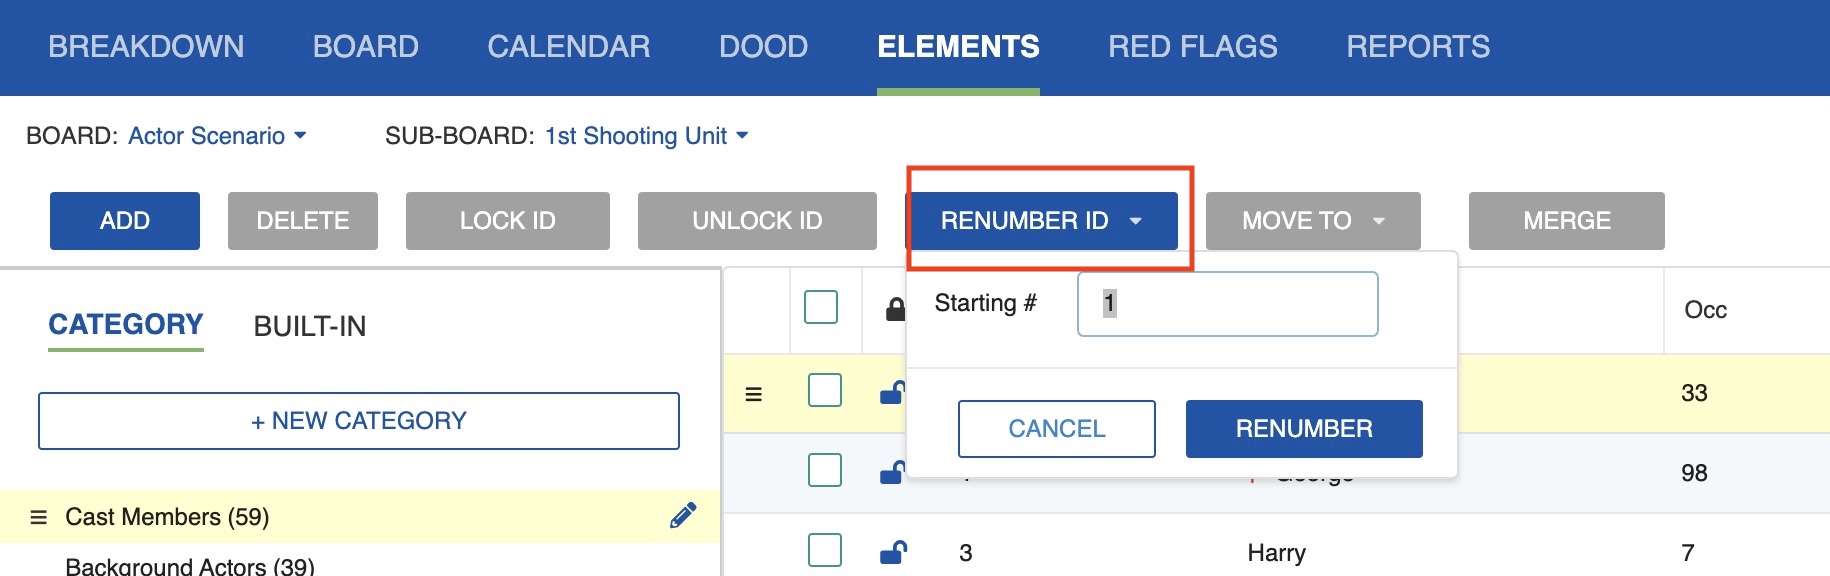
-
Select which integer to begin numbering and click Renumber.
- This will renumber unlocked Elements from the selected integer downward, following the Custom SORT order while skipping locked numbers.
Note
Alphanumeric Board IDs (such as 1A, 3(m), or 120X) are supported, but are not handled by the automatic renumber.
Lock or Unlock
To lock or unlock an Element's Board ID:
-
Select one or more Elements using the checkboxes.
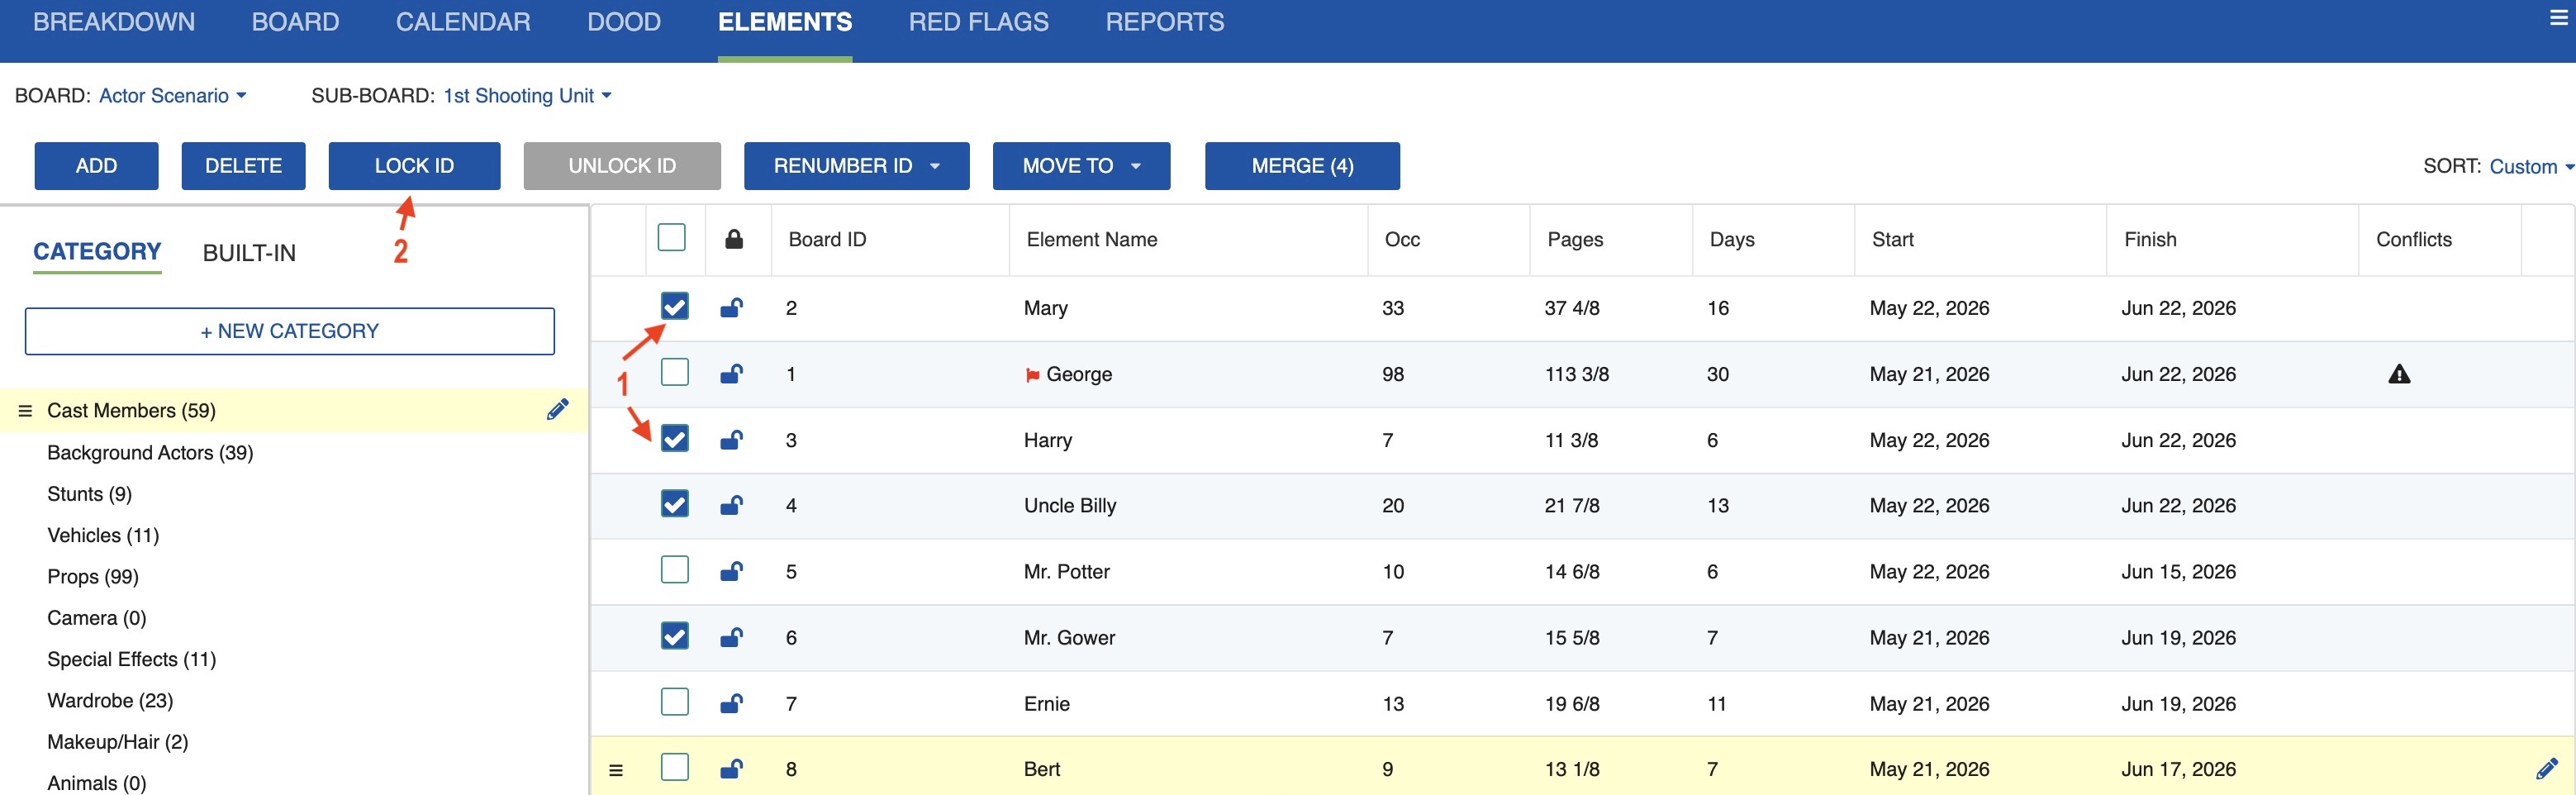
-
Use the Lock IDs or Unlock IDs buttons at the top of the table.
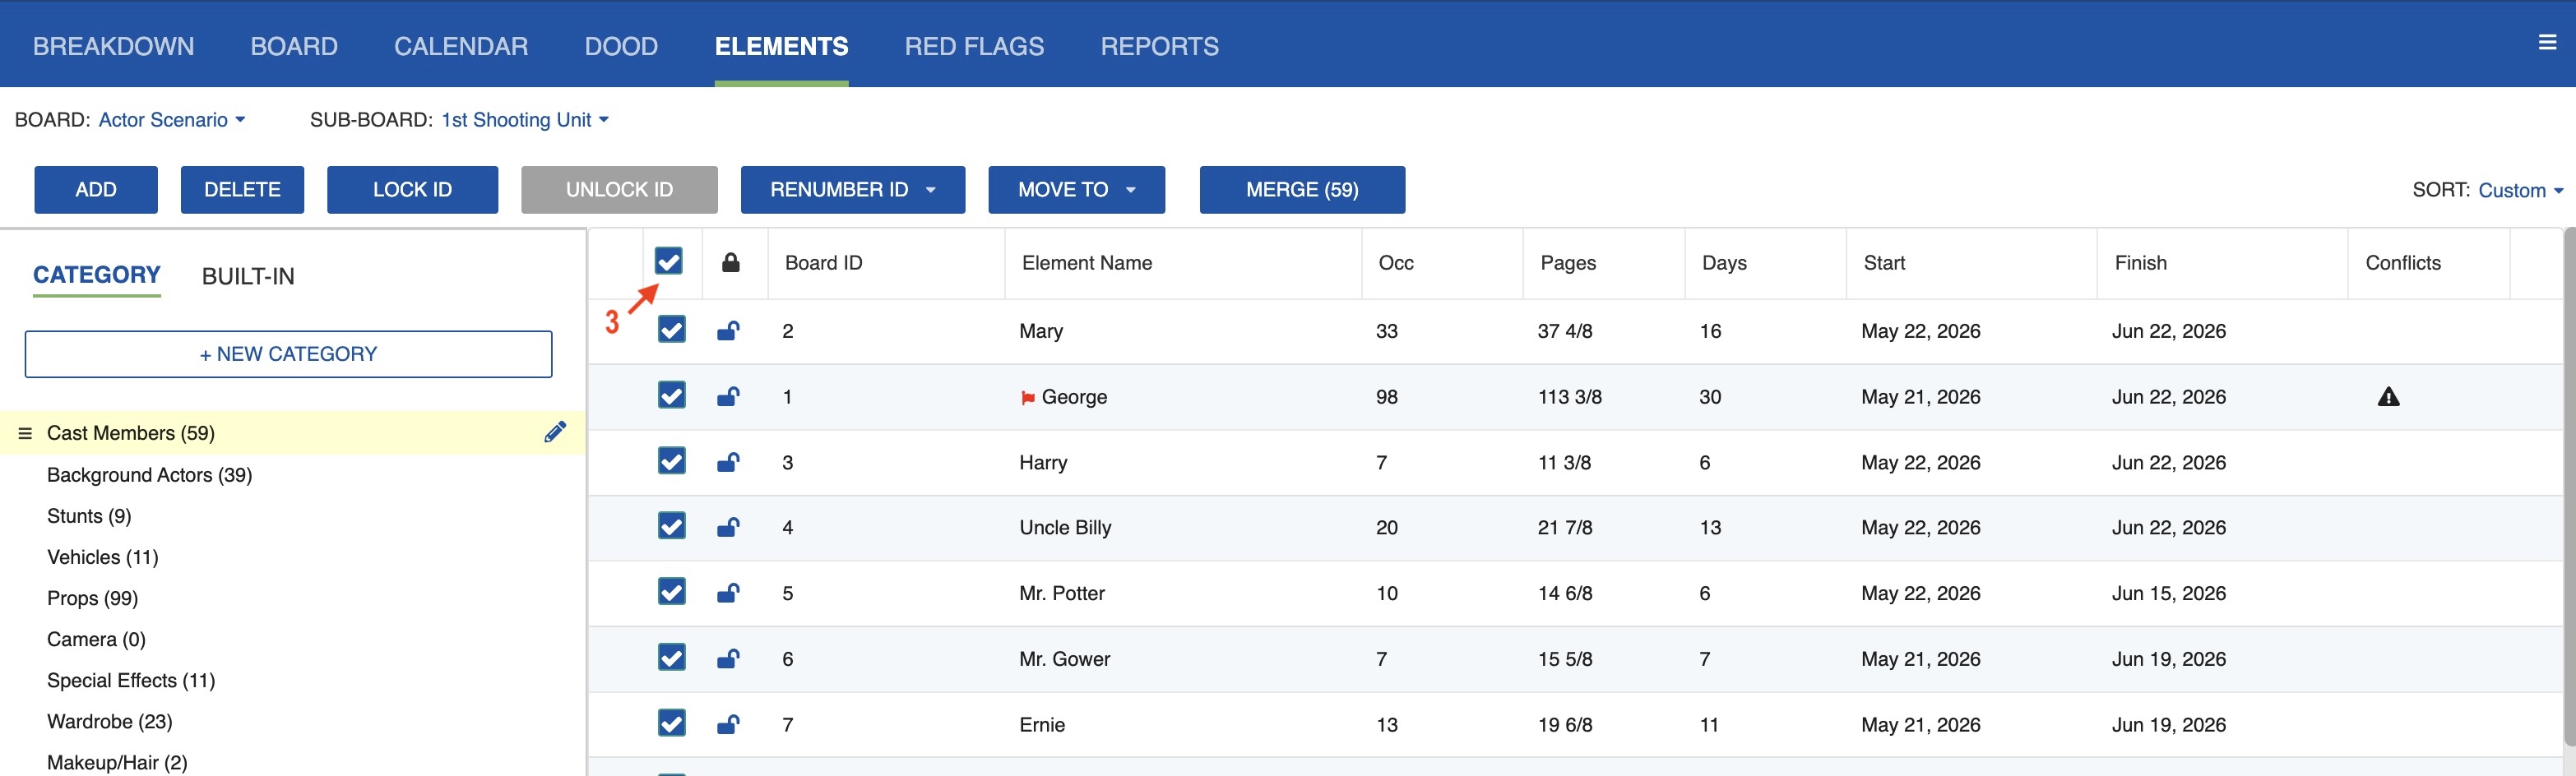
To lock all Element IDs at once, activate the selection box at the top of the window, next to the padlock icon.
Locked IDs are skipped during automatic renumbering.
Merge Element
To merge two Elements into one across the entire Schedule:
- Select the Element you want to merge into another using the selection checkbox.
-
Click the Merge tab.
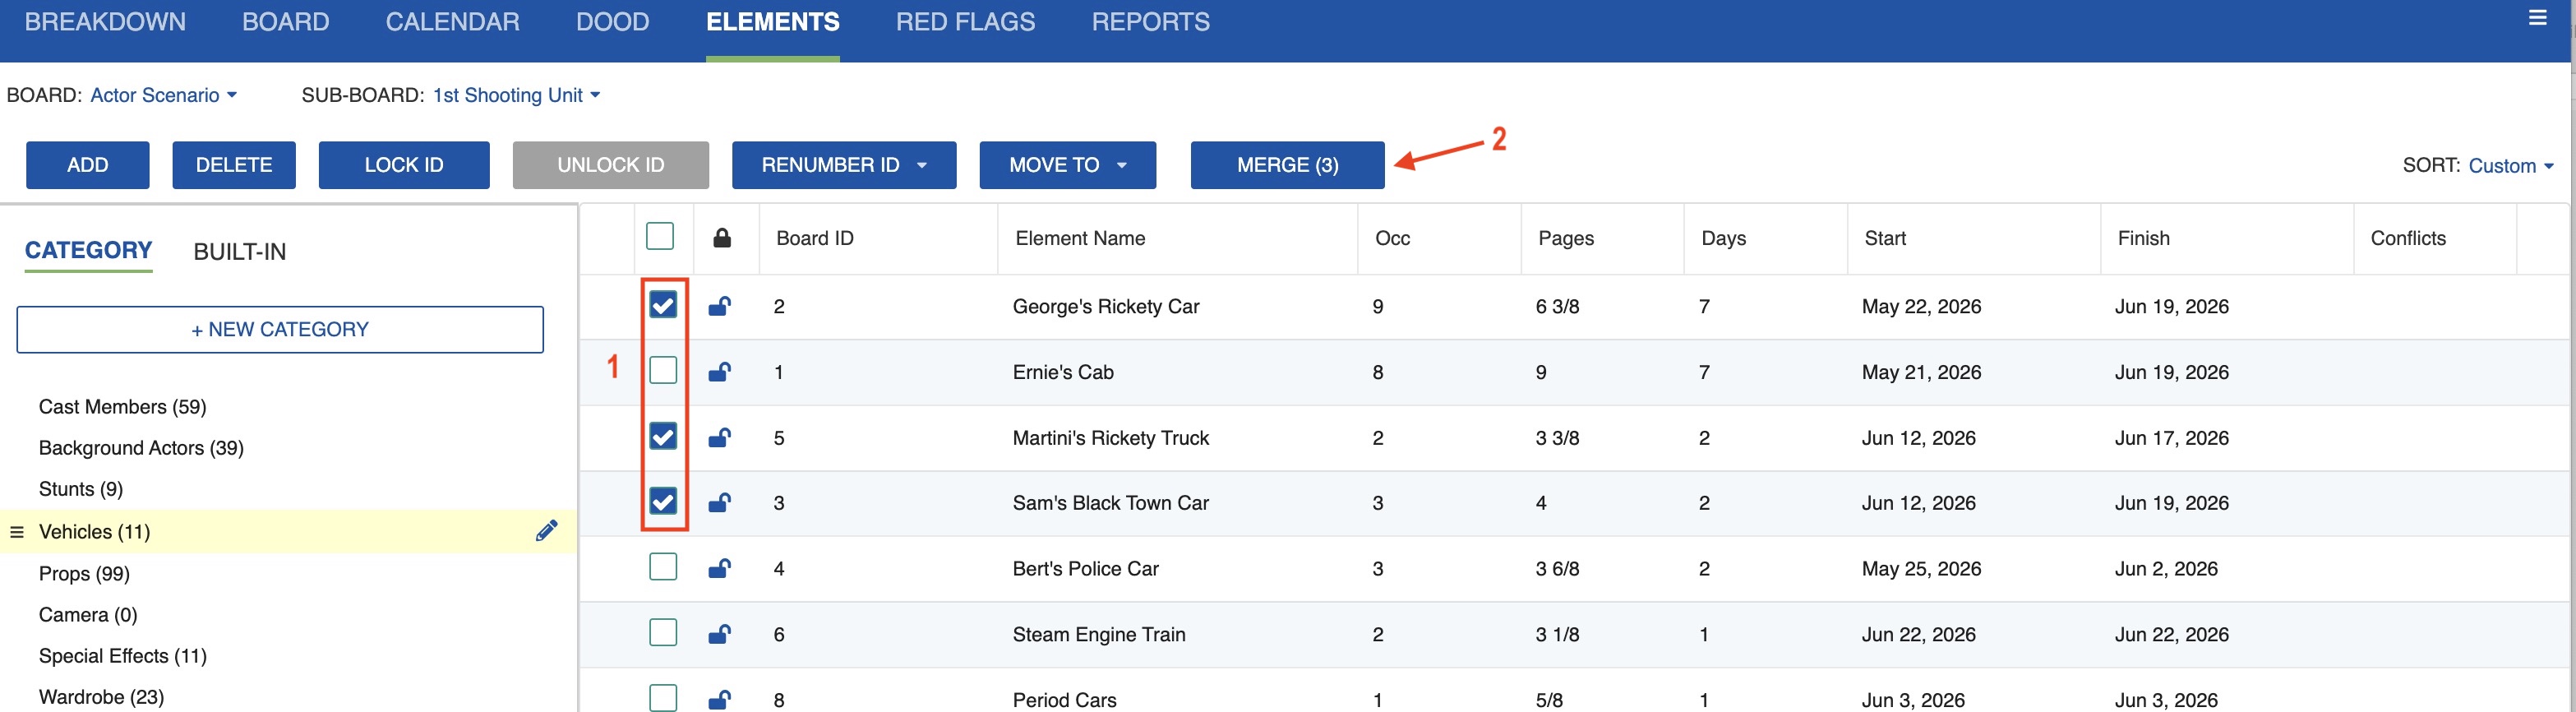
-
Select the Element you want to keep.
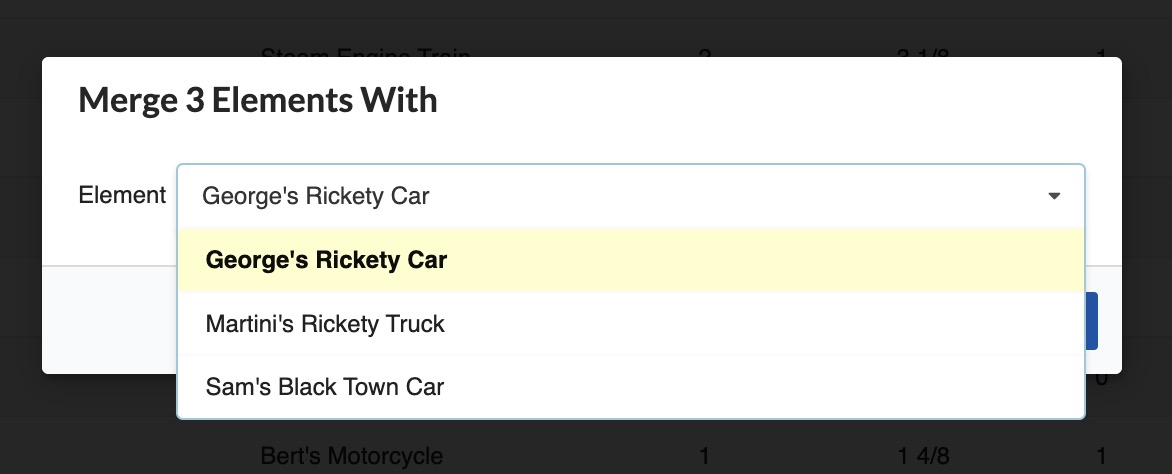
-
Click Save & Close.
Move an Element from One Category to Another
To move Elements to a different Category:
- Select one or more Elements using the checkboxes.
-
Click the Move to tab.
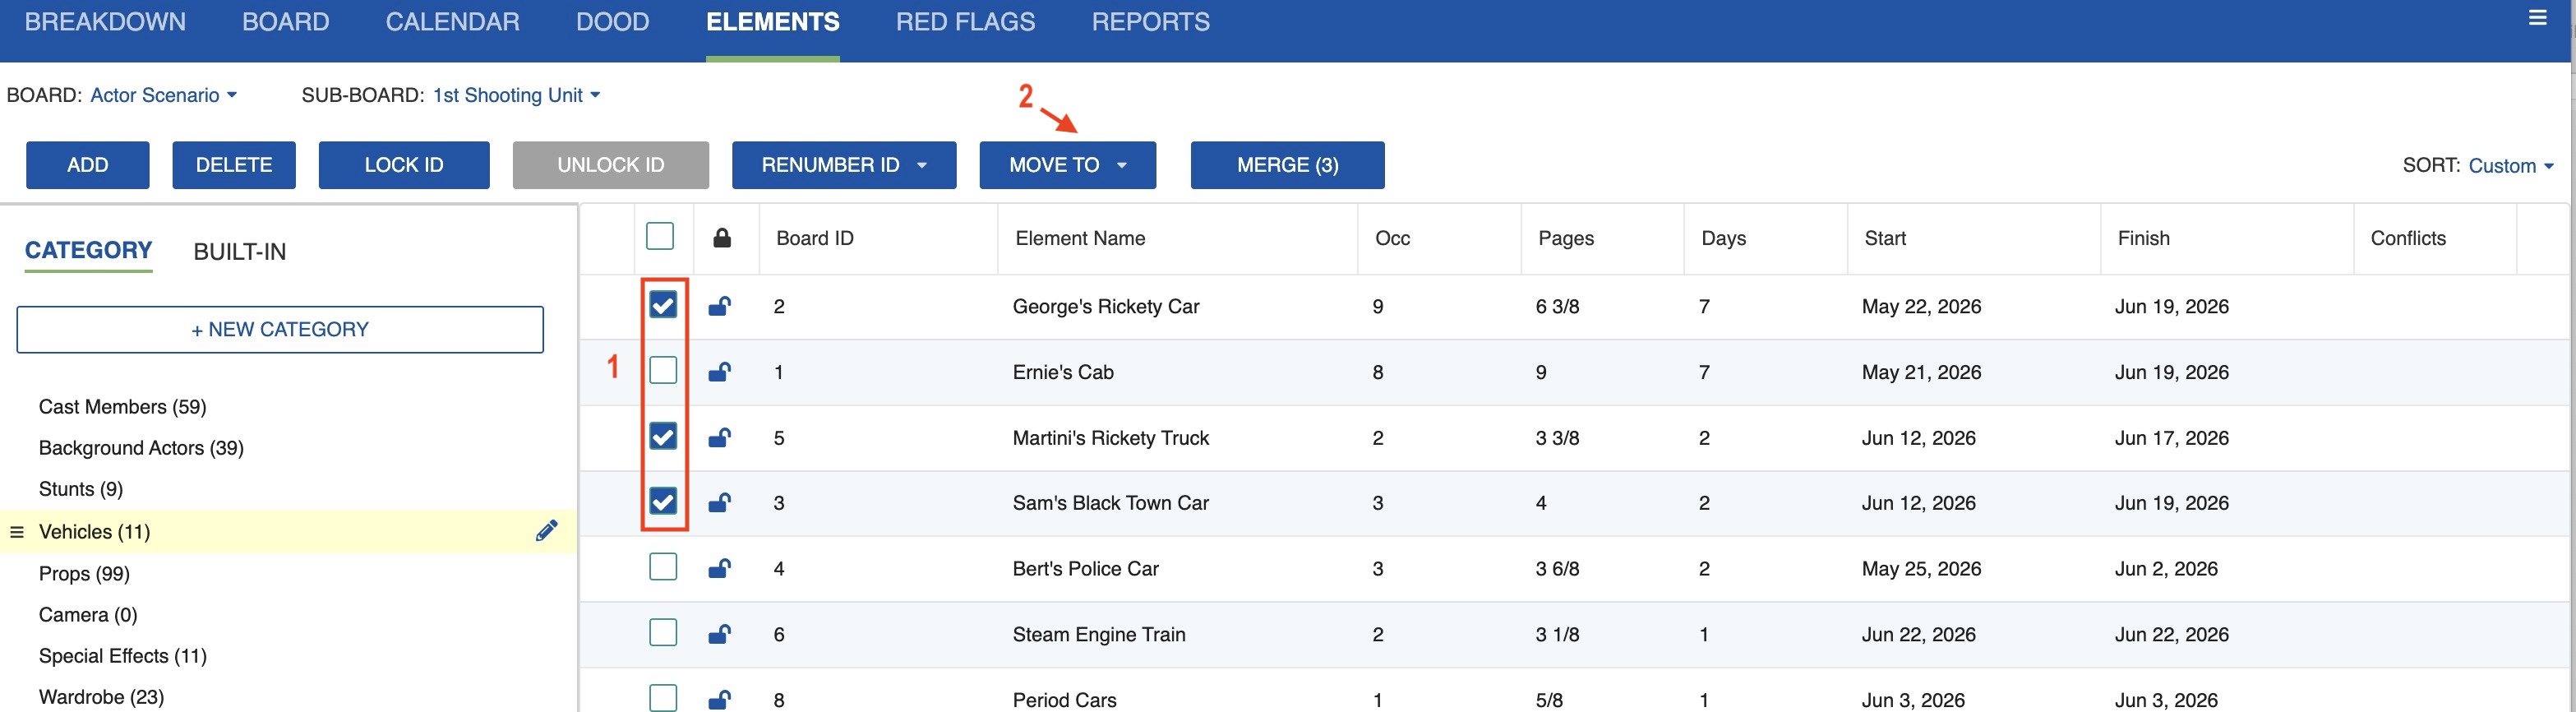
-
Select the target Category.
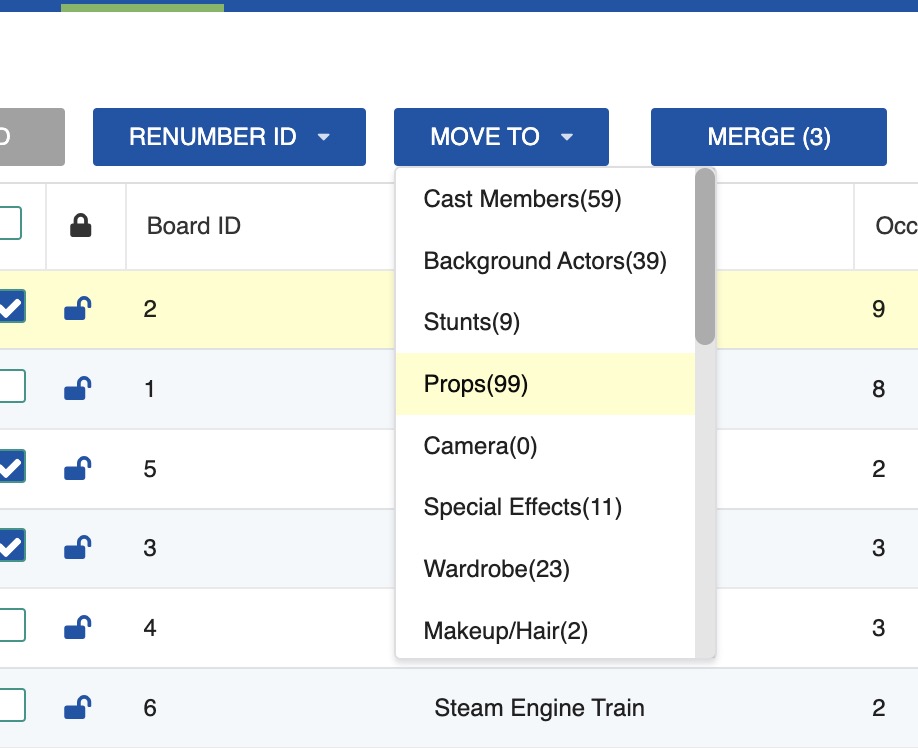
Note
By doing so, all information entered in the Properties fields will be lost, as the Properties fields are unique to each Category.